Hello everyone!
Lately I've been experimenting with wire coil designs. I've made a few samples of coils I thought I'd share. Just recently, my husband saw I was working on coils, and said "You should make Clapton coils". He and I both use e-cigarettes and he knows a lot about putting them together. When I googled it, up came a ton of functional wire coils, and a lot of them I've seen done in wire work, but many of them were completely new to me and could be adapted to jewelry.
So for the last two days or so I've been working on a bunch of samples of coiled wire and coiled coils. Many of them are inspired in part by the 1/2 round wire I have but rarely use.
These coiled coils play off of each other a lot. The possibilities are endless, and they may look complex, but all use surprisingly simple methods. We all know and love the general purpose single wrap using thick gauge wire as a core to wrap thinner gauge wire around. What happens if we use a single wrap coil to coil around another base wire?
I call this one a 'double coil' because that's exactly what it is. The trick to wrapping something thick like a single coil around a larger gauge wire (I use 20 gauge for this) is that after you finish the initial coil, gently slide the coil off the thick gauge core wire and replace it with smaller wire (I use 26 gauge). The smaller wire is more flexible so when you go to coil that coil onto a larger gauge wire you're not fighting with it or distorting the single coil. It also allows the wrap coils to pull apart a bit, which I think adds to its attractiveness.
However, you can take this double coil and add yet another coil to it!
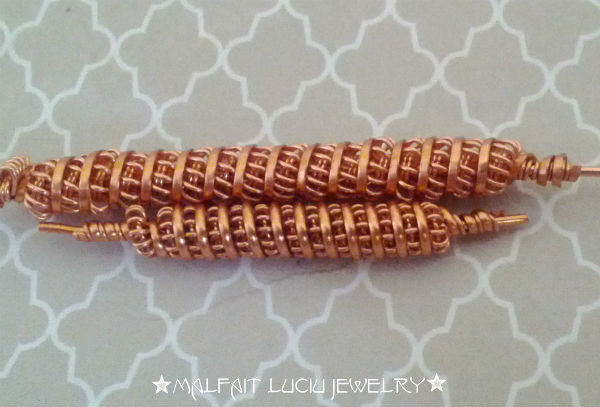
These both have a third wrap, done with half-round wire. The neat thing about half-round wire is that you can use either side of it for various effects. In the top coil, I added a third coil with the flat side of the half-round wire facing out; in the bottom coil, I wrapped with the rounded part of the wire facing out.
You may notice that the original wraps in the two coils above are a little different. That's because the original coil has had it's 20 gauge core wire replaced with a length of 26 gauge wire.
You can see the thinner wire in between the coils. However, on the other coil in the photo, the original coil consisted of two 20 gauge core wires that were replaced with two 26 gauge wires for flexibility.
You can see the two thinner wires in the core of the original coil. Also, since the original coil was made using two 20 gauge wires, the wraps themselves are wider. This holds true for just about any number of core wires; the more you use, the wider the wrap will be, which opens up many opportunities to test and experiment.
Since I was already experimenting with using half-round wire as a third wrap in a coil, I figured I should try it by itself and see what happens if I coiled that coil. It came out looking rather surprising- it reminds me of seed beads! Here also you can clearly see that for the original wrap, I swapped out the 20 gauge core wire for a 26 gauge wire. After that, I just use the 'wire mandrel' that was removed from the original coil as the core of the second wrapped coil.
Still experimenting with the half round wire, I paired it with a 26 gauge wire, and then wrapped both around a 20 gauge core wire at the same time. That meant a lot of small movements, but I think the effect is gorgeous. I will definitely be using this one in my designs soon.
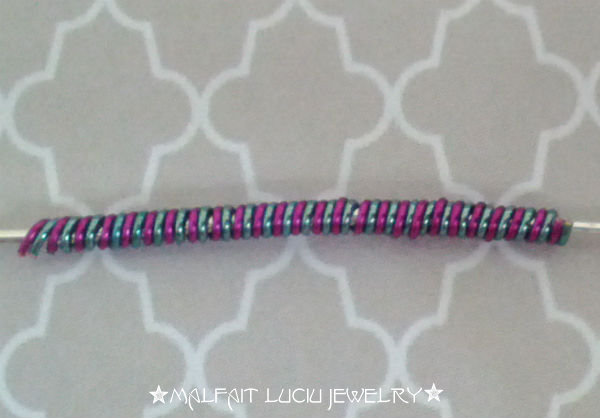
Wrapping two or more wires in different colors at the same time can be fun, too! Really you can wrap as many colors together as you like; just keep in mind you'll have to move each wire around the core one at a time - tedious, but worth it for this look!
I got a little crazy here, haha. The 'seafoam' colored wire started as a coil around three lengths of 20 gauge wire, making the coil very wide. After the first coil was finished, I removed the three 20 gauge base wires and replaced them with three 26 gauge wires, for much needed flexibility. Then for the hell of it, I wrapped between the wraps in the seafoam with 20 gauge silver wire. This one, I think I need more practice with, but I can think of so many uses for it!
I took a few notes while making each of these and have worked out some rough estimates of the length of wire needed for one inch of coil. Note, these are just guidelines, and they use only 20 gauge and 26 gauge wires (my default sizes for basically everything I make).
- Original 26g coil on 20g; 10" 26g = 1" coil
- Second coil; 25" 26g = 1" coil
- 2 20g base coils; 14" 26g = 1" coil
I hope I'm explaining these measurements right! Have you ever used coiled coils in your work? Do you have a favorite coil you always go back to? Let me know in the comments, and show me photos! I want to see :)
'Til Next Time!


Thankyou so much for this. I've been searching everywhere On how to create these Coils. I have favorited your page ❤
ReplyDelete(so sorry for the delay in my reply!) i'm so happy i could help with these examples! :) thank you so much for the favorite, too - i hope you've been having lots of fun making these kinds of coils :D
DeleteThank you for sharing the pictures. I love the color choices you picked out. It seems like it would be a complicated project, but you make it sound easy. I love making things in my spare time. I like the picture of the double coils. I think I might try this sometime soon. Thanks for the measurements and the instructions.
ReplyDeletei'm happy to share! i know this reply is late so i apologize. i think with just a little effort, anyone can make a coiled coil, and they are very versatile!
DeleteLooks great! I can't wait to try making some with my new wire coiling jig! I have one question though: after you take the coil off the "mandrel" do you have to put a piece of wire back inside of the coil before using it? If I didn't, would the coil not stay together correctly? I can't wait to experiment with this!
ReplyDeleteThanks!
im so sorry for the late reply. and yes- once i finish wrapping around a 'mandrel' of 20g wire, i slide the coil off and then run a length of smaller gauge wire through it, 24 or 26 gauge works well. the smaller inner core helps a ton when trying to wrap your coil. using no mandrel at all would be impossible, as would i think using the thicker gauge wire. the coil with the thin wire inside can be a little tricky to start when you're coiling, but i like to coil extra in case the beginning wraps are messy- then i can go back and remove the messy coils without ruining the look. hope that helped! :)
DeleteNice, thanks, lol great another project,like I'm not already like a lost chicken in my new work space...oh well I'll put up another table n see what happens!
ReplyDeleteI really enjoyed your workmanship with the coils. I do have a question.
ReplyDeleteWith all of the coils put together, doesn't it make it to thick to work into a design say in wire wrapping a pendant?
Have you ever tried it with square wire. Could also be interesting also if you twisted a square wire for in between. Thinking out loud. Thanks for the clarification here, I found it to be helpful in my experimenting. I have used it a couple of times before.
ReplyDeletecan you tell me what size half round you used in the 6th picture.. wouldn't that be a totally FAB bracelet!!
ReplyDeleteHow to make a long coil since Mandrel is quite short?
ReplyDeleteThank you so much for sharing your process! This is a perfect article for me because you show the imperfections of trying something new along with the awesome results! I'm definitely going to experiment with coiling now😃
ReplyDeleteLooks great! Achieve the highest drawing speeds and uninterrupted production runs for optimal quality with our innovative wire take-up systems for tangle-free results.
ReplyDelete