Friday, March 31, 2017

How to Apply a Borax Patina on Copper

Hello everyone!

Yesterday I made a post about how to apply an ammonia patina to copper. In that post I mentioned a borax patina that can be done quickly and easily, so I decided to write up this little how-to :)


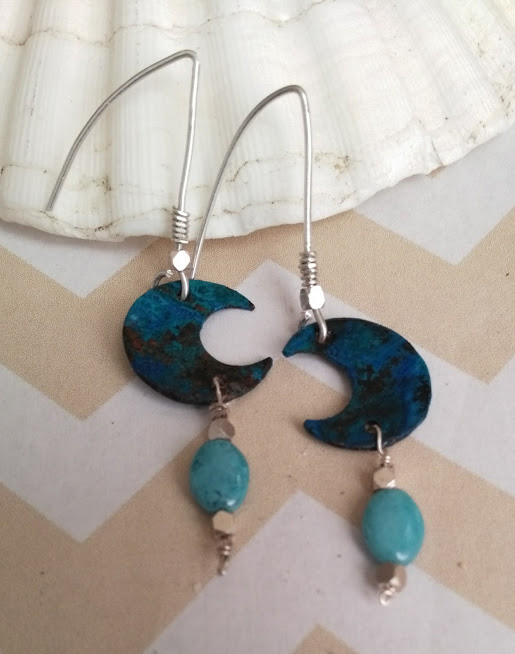
I love this method because it's fast and easy and produces some lovely colors, like the ones in my Copper Heart Earrings. If you like instant gratification as much as I do, then this technique is for you!


Materials and Tools
  • Borax (can be found in the laundry/household cleaners aisle in the grocery store - look for it on the bottom shelves)
  • A small container for the solution you'll mix up, I use a ramekin
  • A soldering/heat proof surface. I use a charcoal brick atop a fire brick
  • A torch - I use a small butane torch
  • A pair of cross-lock tweezers
  • Very hot water (not boiling hot, but as hot as you can get it from your faucet)
  • A piece of copper, of course :D

The first thing you have to do is make sure your copper is clean. Some scrub with a toothbrush and Dawn soap, but I just wipe it down with some rubbing alcohol and that seems to work fine.

Once your piece is cleaned, set it aside and mix your borax solution. In your small container/ramekin, pour in some very hot water (again, not boiling, but it should be a little too hot to the touch). Then, sprinkle in your borax. I personally put a ton of borax in my solution- often so much that not all of it dissolves in the water- I like to super saturate the water with the borax.

You want to work a little quickly here because you don't want your borax solution to cool off too much. Take your copper and set it on your heat-proof surface, and make sure your cross-lock tweezers are handy. With your torch, heat the bejeezus out of your copper. You want to heat it until it glows cherry red. Quickly grab your cross-lock tweezers and use them to grab the piece of copper, and quench it in your borax solution. You want to work fast because you want your copper to be as hot as possible when you quench it.

When you quench your copper, something pretty cool happens! When you first dunk it in the borax solution, the copper will hiss as it cools down rapidly and will turn kind of gray-ish. But just a moment after that, you hear another hiss and can literally see the red patina appear right before your eyes! This is my favorite part, haha! Ive made a video just so you can see how satisfying that double hiss is! :D


I hope you found this little guide helpful! The really great thing about this method is if you don't like the patina you end up with, all you have to do is toss it in the pickle pot for awhile and it will come back copper colored so you can retry your borax patina as many times as you like until you achieve the look you want.

For now I'll leave you with a pic of me holding my mom's kitty Jinx on the day we brought him home. :)


Til Next Time!

Thursday, March 30, 2017

How to Use Ammonia and Salt to Patina Copper

Hello everyone!

Lately I've been playing with various techniques of applying patinas to copper. I'm having a blast playing with heat patinas and borax patinas, but I get the most satisfaction from ammonia and salt patinas.


I thought it might be fun to do a little tutorial on the way I apply patina to my pieces. I'll focus on ammonia and salt patinas for now. They are deceptively easy to achieve! Let me walk you through my process :)

Materials:
  • The copper piece you want to patina 
  • A plastic container, for example one of those disposable food storage containers. It must have a lid! I use a large one but a smaller one would work just fine; but it must be a container you're willing to sacrifice and never use to store food in again
  • Ammonia - all I could find at the store was the lemon scented kind but it works just as well as plain old ammonia
  • Table salt
  • Wire - I use 20 gauge base metal wire
  • Something pointy and metal that can be heated - I use an old needle file
  • A small cheap paint brush

The first step is to create your fume container out of your food storage container. Use your pointy tool/needle file, and hold the tip over a flame to make it hot. Then use it to melt a hole in the side of your container. Melt two more holes beside the first one and try to make them even. Repeat this on the other side of the container, making sure it's directly across from your first set of holes and also at the same height as the first holes.


Now, take a few lengths of wire and feed them through the holes, one side to the other. Bend down the excess wire so it doesn't slide right back out. Repeat for the other two pairs of holes. In my container below, you can see the three wires spanning the width of my container.


At this point, pour in a little ammonia. You don't need a lot! I have maybe a centimeter of ammonia in my container. It's the ammonia fumes that interact with the salt and produce the patina, not the liquid itself, so you don't need a lot.                    


CAUTION
Ammonia fumes are very, very strong and are not something you want to be inhaling. It can also hurt your eyes, so please work in a very well ventilated place with safety goggles!


Next, take your copper piece and paintbrush and brush it with some of the ammonia, then set it on top of the wires in your fume container so it's suspended above the ammonia. 

Next, while the piece is still wet, sprinkle a VERY generous amount of table salt onto your piece.


Now comes the waiting. Put the lid on your fume container and carefully move it to a place where it will not be disturbed.

You'll notice after a little while, the salt has turned blue! It's an encouraging sign, but don't get too excited - at this point the blue is only on the salt, not the copper piece beneath.


After leaving the whole assembly alone for awhile, the patina on the copper will slowly build. This takes time; I usually leave my items in the fume container for three days, although you can go longer if you like.

Once the three days are up, it's time to remove your piece. Rinse off the salt crust with a little water, and take a look at your gorgeous patina!


At this point I use a couple coats of ProtectaClear to protect and preserve the patina. Now you're ready to use your patina pieces in whatever jewelry project you have in mind :) Here's another example of this method:


I hope this little mini tutorial is useful! Next I think I'd like to document the process of adding a borax patina to your copper pieces, as I've done here with these earrings:


It's a great method that gives a lovely mottled red color to your copper, and an added bonus is there's no waiting for days for it to develop, it shows up right away! :)

For now, I'll leave you with my sweet boy Neo, keeping me company in my studio (my cats are so spoiled, they get their own little pillow to sit on on my work table! But mainly I put it there because otherwise they like to hop up and lay right down on the table on top of all my work! haha)


Til Next Time!