Hello everyone!
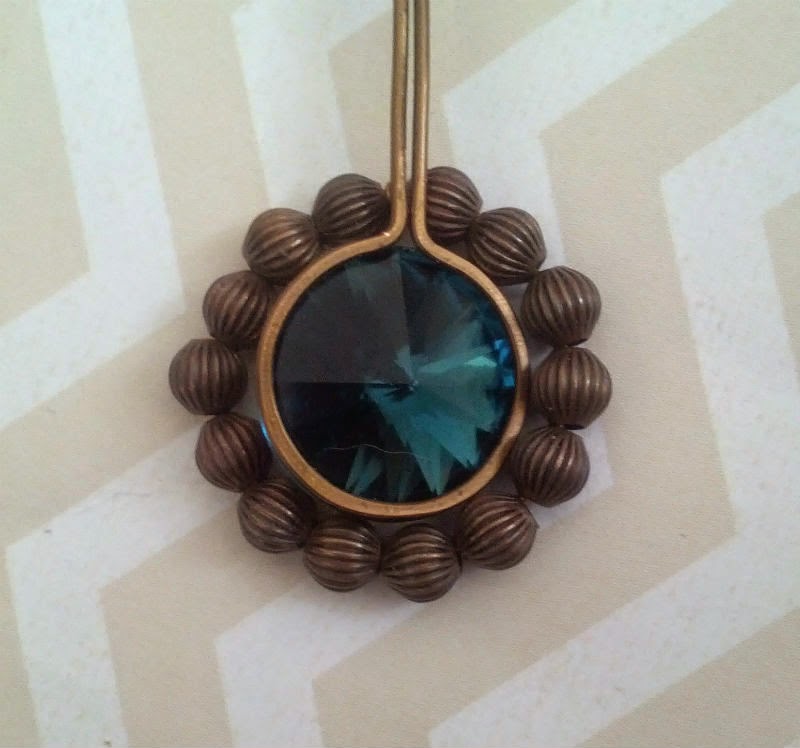
I've got another free tutorial for you today- a new way to bezel a rivoli or other relatively low-dome cabochon in wire using beads as support.
I wanted a way to capture a rivoli securely in wire without resorting to the traditional wire-wrapping method of using stacks of wires surrounding a stone with the front and back wires bent to act as 'prongs' to hold the stone in place. It's an effective method but is so played out and boring with the wire ends as curls at the top of the bail... it can be done beautifully but I find it to be just... boring.
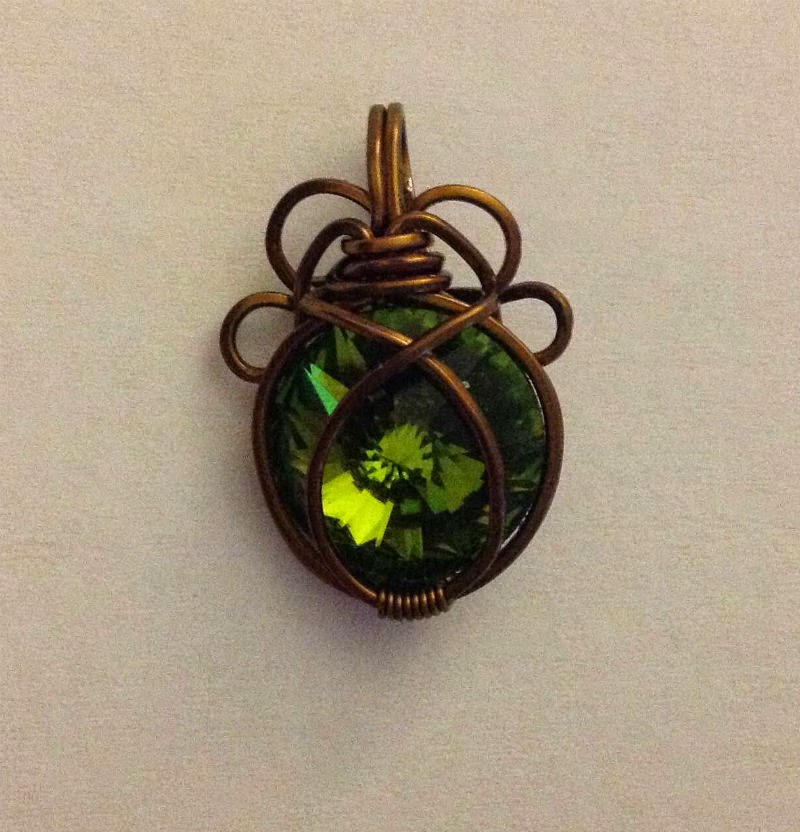 |
| Just for fun, here's a rivoli I bezeled in a variation of the 'traditional' style years and years ago. Not my best work! :P |
I knew if I was going to come up with a new way to capture a rivoli, it had better be secure. I think I've achieved that here. This method is also relatively versatile- the beads can work in this design in many sizes and the design can be adapted to any size rivoli or low-dome cabochon.
❦ ❦ ❦
Note: this tutorial is protected by an International Creative Commons Attribution-NonCommercial-ShareAlike licence. This means that you are free to post this wherever you like as long as you give proper Attribution (that is, to me, Jet Kosanke, and my website, malfaitluciu.blogspot.com), it may not be used commercially (you're not allowed to make money off it, that is, sell this tutorial to other people for money), and you're free to make changes to it as long as you also share it under these same restrictions (that is, you still give Attribution to me, you don't sell it, and you allow it to be shared freely.) For more information, click the Creative Commons link at the end of the tutorial.
By the way- NonCommercial doesn't mean you can't sell works you make using this tutorial. If you make a necklace, bracelet, or whatever using this tutorial, feel free to sell it- however, you may not mass-produce it, and the Attribution part still applies, that is, you still have to attribute the design to me.
If you're unsure if what you want to do is allowed, just ask me! I'm really pretty laid back about things like this :) I'd rather share my knowledge and discoveries for free so others can learn than charge money for my tutorials. With all that said, on to the good stuff! :)
❦ ❦ ❦
Click on any image to view a larger version.
For this tutorial I used:
1 14mm Montana Blue Swarovski rivoli crystal
14 4mm bronze melon beads
20 gauge dead soft bronze colored copper wire
26 gauge dead soft bronze colored copper wire
Step 1
Cut about five or so inches of 26 gauge wire and string some of your small beads on it. You want to string just enough beads on that when shaped into a loop, they just fit around your rivoli with maybe a millimeter or so of wiggle room. You want them to fit as closely around the rivoli as possible without being too small- a hair too big is better than too small. For my rivoli, it took 14 of my melon beads to fit comfortably.
Step 2
When you've determined how many beads you need to fit around your rivoli, pass one end of the wire back through the first bead you strung to form a loop, and pull tightly to snug the beads into a circle.
Step 3
Try to maintain relatively tight tension of the wire running through your beads during this step and the next. Minor gaps between the beads are okay but you don't want any large noticeable spaces between any of the beads. Take one of your wire tails and wrap it around the bit of wire between the bead the tail is coming out of and the bead next to it. Wrap about three times, then snip off the excess and use your chain nose pliers to press down the tail end. If the holes in your beads are large enough to allow for it (like mine are here), try to maneuver the wraps you just made so they're hidden inside one of the beads- not a required step but it helps keep things looking neat.
Step 4
Repeat step 3 with the other wire tail. You're not going to be able to hide these wraps inside a bead, but that's okay, we'll obscure them later. Make about three wraps around the core wire running through the beads, snip the wire end off, and use your chain nose pliers to press the wire end flush with the wraps. You should end up with a bendable but relatively strong ring of beads with one spot of noticeable wraps, as shown below. The rivoli should nest into it comfortably but not super tightly.
Step 5
Set aside your ring of beads for now, and cut about 6 inches of 20 gauge wire from the spool. In the center of this piece of wire we're going to create a circle. It doesnt need to be a perfect circle but you do want to get it as close as you can to perfect, so take some time to really get this loop shaped nicely. This loop needs to be juuust smaller in diameter than the rivoli- we dont want the loop to encircle the crystal, we want the loop to sit on top of the crystal and rest just at the verrry edge of it all the way around.
You can shape the wire with your fingers and then use your round-nose pliers to even out the curved shape bit by bit, or you can use a round object close in diameter to the rivoli, such as a marker, as a mandrel, or you can try to shape the wire around the rivoli itself (although this is rather fiddly and frustrating). If you do shape the wire around the rivoli itself, keep in mind that once you form the circle around the crystal, you're going to have to adjust the circle to be a little smaller because we need this wire to sit on top of the crystal, not fit around the perimeter of it. I personally use a pair of convex-flat pliers to create this loop (check out this post for a review on convex-flat pliers and why you should consider adding a pair to your toolbox!)
Step 6
Now that our circle is the right size, it's time to bend the tails up. I use my chain-nose pliers for this. Make two bends so that the wire ends stick up parallel to each other straight up out of the wire circle.
Step 7
Grab your steel block and your chasing hammer - we're going to hammer the circle to flatten it out a bit. This is partly for aesthetics and partly to add to the security of the setting later on - flattening the wire slightly will give it a little more surface area to hold the rivoli down. Don't hammer the straight parts, just the circle. Try to keep your hammer strikes firm and even; hammering always distorts the wire somewhat, but we don't want to lose the circular shape or hammer it so much that the circle ends up too wide and no longer sits atop the rivoli. Don't go whacking away at it like a crazy person- just firm, even strikes; only hammer until your circle is evenly flat all around, and the wire is about a millimeter wide.
Step 8
Get your ring of beads and center your rivoli in it, then lay your hammered circle over top of the rivoli to check the fit. Remember the spot on the beaded ring with the visible wire wraps? That's where we're going to put the two straight wires on the wire circle, so it won't be visible. If everything has gone right so far, your wire circle should bridge any gap between the rivoli and the bead ring while still overlapping the edge of the rivoli all the way around.
Step 9
Set aside the wire circle and the ring of beads for now and cut another 6 inches or so of 20 gauge wire. Make another circle with this wire, the same way as the first one, just smaller in diameter than the rivoli so that the circle rests on top of the edges of the crystal.
Step 10
Instead of bending the ends of the wire straight up and parallel like the first circle, this time we're going to use our round nose pliers to shape one end into a somewhat large spiral into the inside of the circle. Keep the spiral up toward the edge of the circle, you don't want it in the middle of the circle. When you've formed your spiral, snip off any excess wire and discard it.
Step 11
Where the second tail of the wire just meets the start of the spiral you made in the last step, snip the tail off and gently shape the wire back into a circle if it's become distorted at all.
Step 12
Get out your steel block and chasing hammer again and evenly and firmly hammer all around the wire shape you've just made. Just like last time, you don't want to hammer too hard or too much, because we want to make sure that we don't distort the wire and have it end up too big to rest on the edges of the rivoli anymore. This hammering is partly for aesthetics (it's nice to have the back of a piece look somewhat neat, don't you think?) but also for strength, because this shape is not closed - the non-spiraled end isn't connected to anything so we want to make sure it's strong and that it will hold its shape under stress.
Step 13
Pick up your rivoli again and lay the spiral shape on the back of it to test the fit and ensure that it still sits just on the edges of the crystal. Also, use your fingers to gently press the shape against the back of the crystal - because rivolis have pointed backs and not flat backs, we want to press this wire shape so that it fits snugly against the pointed back of the crystal.
Step 14
Set the rivoli and the spiraled piece of wire aside for now and pick up the first circle shape we made and the ring of beads. Using a short piece of 26 gauge wire (I just pull a piece from my container of scrap wire - this wire is only going to be used temporarily so it doesn't matter if it's kinked or ugly or a different color or whatever), bind the wire circle shape to the ring of beads, wrapping the scrap wire between two beads and around the wire circle once or twice. Try not to attach the wire circle in such a way that it is directly in the center of the ring of beads, but instead just a little above the center (because eventually the rivoli will be in the very center of the beads and we want to allow some room for it). Don't worry about making this part pretty- it's a purely temporary functional step that you'll be undoing later.
Step 15
Repeat step 14 in a couple more places around the ring of beads. Remember earlier in step 8 when we mentioned putting the two straight parallel parts of the wire circle in front of the visible wraps on the beaded ring? Keep that in mind while adding the temporary scrap wire supports in this step.
Step 16
From here on, we'll be working with the rivoli and the back circle of wire in place. It can get a little fiddly, but the temporary wires we put in place in the previous steps will help a lot here. Place the rivoli face down into the beaded ring so it's resting on the first circle of wire, and then center the second circle of wire onto the back of the rivoli and hold it in place with your thumb.
Step 17
At this point you'll need to decide where you're going to use the 26 gauge wire to 'anchor' all the pieces of the whole assembly together; preferably at points that are symmetrical on each side. Where exactly you place your anchor wires will depend on the number (and therefore size) of the beads you're using and the size of the rivoli or low-dome cab you're using. Refer to the photo above- for this project, I placed anchors in five places, one directly at the bottom halfway between the 14 beads, then two more anchors on either side that mirror each other, for an overall even appearance.
To place an anchor, first cut a piece of 26 gauge wire about 4 inches long or so. Using your thumb and fingers to hold the rivoli and the back circle of wire in place, slip the wire underneath the front circle of wire and behind the ring of beads at the spot where you've decided to place your first anchor.
Step 18
Flip the whole assembly over and slip the end of the 26 gauge wire you just added in the last step underneath the back circle of wire and pull it through so that about half of the wire is on the front of the assembly and half is on the back.
Step 19
Still holding everything in place with your thumb and fingers, begin wrapping the 26 gauge wire around the back circle of wire to secure it. I find that 5 wraps is sufficient. After 5 wraps, snip the leftover wire and use your chain-nose pliers to press the cut end flat against the circle of wire.
Step 20
Flip the assembly over and locate the other end of the 26 gauge wire you wrapped in the last step. Pull it up snugly from the back, over the front circle of wire, and around to the back, loosely aligning it between the two beads where you've decided to place your anchor.
Step 21
Still holding everything together with your thumb and fingers, flip the assembly back over to the back. Take the end of the 26 gauge wire and guide it underneath the back circle of wire next to the wraps you made in step 19. Pull the wire through gently but firmly all the way through, making sure that the wire nestles itself in between the two beads you've decided to place your anchor between.
Step 22
Wrap the 26 gauge wire around the back circle of wire five times, this time in the opposite direction of the first five wraps you made in step 19. Snip the excess wire and use your chain-nose pliers to press the cut end flat against the circle of wire.
Step 23
Continue adding anchors in this manner in the locations you've decided will look best. Ideally, try to place the back circle of wire in such a way that the point where the cut end of it meets the curled end of it ends up at an anchor point. Add an anchor wire here as before, but when making the wraps with the 26 gauge wire, try to wrap it so that at least some of the wraps capture both ends of the circle of wire. It's not the end of the world if you don't do this part or if your placement of anchors doesn't allow for this. Your anchors will still securely hold the rivoli- this will just add a little bit of extra security.
As you add anchors, remove the temporary scrap wires as you go when appropriate. As anchors are added, these temporary wires will become less necessary and manipulating the entire assembly will become less fiddly.
Step 24
After adding your last anchor and snipping the last wire, take a moment to run your fingers along the wraps to feel for any wire ends that are sticking out too far and may scratch skin or catch on clothing, and if you find any, snip them shorter with your flush cutters and press them down more snugly with your chain-nose pliers.
Step 25
Flip your pendant back over. Cut about a 2 inch piece of 26 gauge wire, secure it at the back of the bottom of the two parallel pieces of wire sticking up from the top of the pendant, and neatly wrap the 26 gauge wire around the two straight wires for 6 or 7 coils, or until the wraps reach the same height as the beads. Snip the excess 26 gauge wire in the back of the pendant and press the cut end flat against the parallel wires with your chain- or flat-nose pliers.
Step 26
Snip the two parallel wires evenly about an inch above the wraps you did in the last step.
Step 27
With the tip of your round-nose pliers, grasp the ends of the parallel wires and create a small loop in the ends of both wires evenly from back to front.
Step 28
Still using your round-nose pliers, create another, larger loop further down the parallel wires from front to back, creating a small looped bail for a chain or ribbon. The small loops made in step 27 should touch the wraps made in step 25.
And with that, your pendant/component is complete! Use your fingers to press and adjust the beads around the rivoli if necessary, in case any are sticking out a little further than others; just gently manipulate them until they're evenly spaced and the component is nice and round.
I hope you enjoyed this tutorial, and if you have any questions, feel free to ask in the comments :)
If you create something using this tutorial, I'd love to see it! Email me photos of your work (with a link to your blog if you have one) to malfaitluciu@gmail.com - I'd like to create a gallery page on my blog featuring your creations made using this tutorial (or any of
my tutorials) with a link back to your blog, too :) Don't be shy, let me show off your work! :)
For now, I'll leave you with my kitty Trinity, who insists on sitting on any square or rectangular object she finds.
'Til next time!