Showing posts with label free. Show all posts

Friday, March 31, 2017

How to Apply a Borax Patina on Copper

Hello everyone!

Yesterday I made a post about how to apply an ammonia patina to copper. In that post I mentioned a borax patina that can be done quickly and easily, so I decided to write up this little how-to :)


I love this method because it's fast and easy and produces some lovely colors, like the ones in my Copper Heart Earrings. If you like instant gratification as much as I do, then this technique is for you!


Materials and Tools
  • Borax (can be found in the laundry/household cleaners aisle in the grocery store - look for it on the bottom shelves)
  • A small container for the solution you'll mix up, I use a ramekin
  • A soldering/heat proof surface. I use a charcoal brick atop a fire brick
  • A torch - I use a small butane torch
  • A pair of cross-lock tweezers
  • Very hot water (not boiling hot, but as hot as you can get it from your faucet)
  • A piece of copper, of course :D

The first thing you have to do is make sure your copper is clean. Some scrub with a toothbrush and Dawn soap, but I just wipe it down with some rubbing alcohol and that seems to work fine.

Once your piece is cleaned, set it aside and mix your borax solution. In your small container/ramekin, pour in some very hot water (again, not boiling, but it should be a little too hot to the touch). Then, sprinkle in your borax. I personally put a ton of borax in my solution- often so much that not all of it dissolves in the water- I like to super saturate the water with the borax.

You want to work a little quickly here because you don't want your borax solution to cool off too much. Take your copper and set it on your heat-proof surface, and make sure your cross-lock tweezers are handy. With your torch, heat the bejeezus out of your copper. You want to heat it until it glows cherry red. Quickly grab your cross-lock tweezers and use them to grab the piece of copper, and quench it in your borax solution. You want to work fast because you want your copper to be as hot as possible when you quench it.

When you quench your copper, something pretty cool happens! When you first dunk it in the borax solution, the copper will hiss as it cools down rapidly and will turn kind of gray-ish. But just a moment after that, you hear another hiss and can literally see the red patina appear right before your eyes! This is my favorite part, haha! Ive made a video just so you can see how satisfying that double hiss is! :D


I hope you found this little guide helpful! The really great thing about this method is if you don't like the patina you end up with, all you have to do is toss it in the pickle pot for awhile and it will come back copper colored so you can retry your borax patina as many times as you like until you achieve the look you want.

For now I'll leave you with a pic of me holding my mom's kitty Jinx on the day we brought him home. :)


Til Next Time!

Thursday, March 30, 2017

How to Use Ammonia and Salt to Patina Copper

Hello everyone!

Lately I've been playing with various techniques of applying patinas to copper. I'm having a blast playing with heat patinas and borax patinas, but I get the most satisfaction from ammonia and salt patinas.


I thought it might be fun to do a little tutorial on the way I apply patina to my pieces. I'll focus on ammonia and salt patinas for now. They are deceptively easy to achieve! Let me walk you through my process :)

Materials:
  • The copper piece you want to patina 
  • A plastic container, for example one of those disposable food storage containers. It must have a lid! I use a large one but a smaller one would work just fine; but it must be a container you're willing to sacrifice and never use to store food in again
  • Ammonia - all I could find at the store was the lemon scented kind but it works just as well as plain old ammonia
  • Table salt
  • Wire - I use 20 gauge base metal wire
  • Something pointy and metal that can be heated - I use an old needle file
  • A small cheap paint brush

The first step is to create your fume container out of your food storage container. Use your pointy tool/needle file, and hold the tip over a flame to make it hot. Then use it to melt a hole in the side of your container. Melt two more holes beside the first one and try to make them even. Repeat this on the other side of the container, making sure it's directly across from your first set of holes and also at the same height as the first holes.


Now, take a few lengths of wire and feed them through the holes, one side to the other. Bend down the excess wire so it doesn't slide right back out. Repeat for the other two pairs of holes. In my container below, you can see the three wires spanning the width of my container.


At this point, pour in a little ammonia. You don't need a lot! I have maybe a centimeter of ammonia in my container. It's the ammonia fumes that interact with the salt and produce the patina, not the liquid itself, so you don't need a lot.                    


CAUTION
Ammonia fumes are very, very strong and are not something you want to be inhaling. It can also hurt your eyes, so please work in a very well ventilated place with safety goggles!


Next, take your copper piece and paintbrush and brush it with some of the ammonia, then set it on top of the wires in your fume container so it's suspended above the ammonia. 

Next, while the piece is still wet, sprinkle a VERY generous amount of table salt onto your piece.


Now comes the waiting. Put the lid on your fume container and carefully move it to a place where it will not be disturbed.

You'll notice after a little while, the salt has turned blue! It's an encouraging sign, but don't get too excited - at this point the blue is only on the salt, not the copper piece beneath.


After leaving the whole assembly alone for awhile, the patina on the copper will slowly build. This takes time; I usually leave my items in the fume container for three days, although you can go longer if you like.

Once the three days are up, it's time to remove your piece. Rinse off the salt crust with a little water, and take a look at your gorgeous patina!


At this point I use a couple coats of ProtectaClear to protect and preserve the patina. Now you're ready to use your patina pieces in whatever jewelry project you have in mind :) Here's another example of this method:


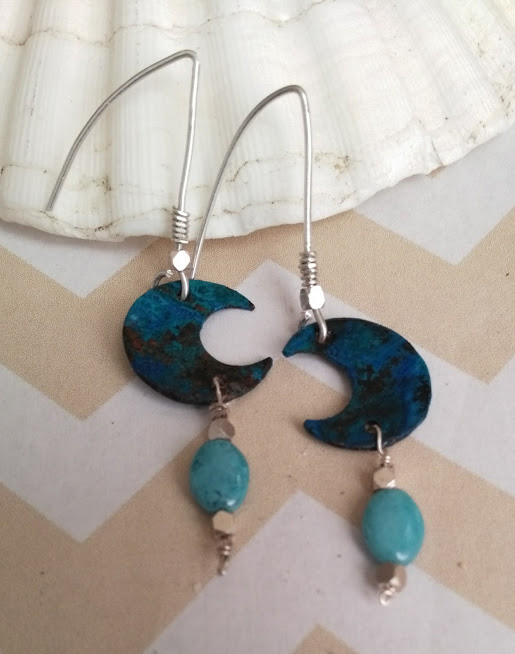
I hope this little mini tutorial is useful! Next I think I'd like to document the process of adding a borax patina to your copper pieces, as I've done here with these earrings:


It's a great method that gives a lovely mottled red color to your copper, and an added bonus is there's no waiting for days for it to develop, it shows up right away! :)

For now, I'll leave you with my sweet boy Neo, keeping me company in my studio (my cats are so spoiled, they get their own little pillow to sit on on my work table! But mainly I put it there because otherwise they like to hop up and lay right down on the table on top of all my work! haha)


Til Next Time!


Friday, March 4, 2016

200 Facebook Likes Giveaway! *CLOSED*

Hello Everyone!

I'm thrilled to announce that we've hit 200 Likes on Facebook! I promised another giveaway when we hit that number and here it is! 

The Prize


The prize this round is a pair of my handmade "Sapphirus" earrings! These are truly 'statement' jewelry- they're long and glamorous and have tons of movement. As always, all the weaving here is done by hand including the hand-hammered custom earwires. I had a lot of fun making these! I rarely use blue in my designs but these are a departure from my 'usual' :)

You can enter by using the Rafflecopter widget below.


This giveaway begins today, 3/4, and ends at 11:59pm on 3/18. I'll announce the winner here on the blog, over on the Malfait Luciu facebook page, and by email. The winner must respond to the email within 48 hours with their home address so I can mail out the prize; after 48 hours without a response, a new winner will be chosen at random.

I'm so excited to see who will win! Thanks so much to everyone who has supported me this far - you're the best! After this giveaway is over, I'll run the next giveaway when I reach 350 Facebook likes, so do feel free to share; I love running these and the more my page is shared, the sooner I'll be able to run another giveaway! :)

Thanks much, and Good luck! <3

Wednesday, January 7, 2015

100 Facebook Likes Jewelry Giveaway! *CLOSED*

I am thrilled to announce that, thanks to the efforts of my friends and followers of my jewelry page on Facebook, Malfait Luciu Jewelry, I have reached the all-important 100 'likes' milestone! As promised, since we've reached (over!) 100 'likes', I'm hosting a free giveaway for a custom jewelry piece. The prize this time is my 'Provençal' Earrings - the first result of my current fascination with white wire.


These 'Provençal' Earrings are carefully handcrafted in an intricate filigree design and feature large faceted opaque turquoise czech glass focal beads, and they hang from comfortable handmade hammered and filed non-tarnish silver earwires. They hang about 3 3/4" from the very top of the earwires. Here are a pair of photos to give a general idea of their overall size:


They were a joy to make and I hope they will be a joy to wear and own for one lucky winner!

The giveaway starts today, Wednesday, January 7th, 2015, and ends at 12:00 AM (EST) on January 15th, 2015. You can enter via the Rafflecopter widget below. There are two ways to enter, and it is possible to gain six entries - you get one entry for visiting the Malfait Luciu Jewelry Facebook page, and a whopping 5 entries for commenting in the Rafflecopter widget and answering a simple question: What is your opinion of matching earring/necklace sets? Love 'em? Never wear 'em? Let me know in the widget for an easy FIVE entries!

After the giveaway is over, the winner will be chosen at random from all the entries via the Rafflecopter widget I've implemented. The winner will be contacted by email from MalfaitLuciu (at) gmail (dot) com. The winner will also be announced on the Malfait Luciu Jewelry Facebook Page. In the event that the winner does not reply to the email within 48 hours (in order to give me the address to send the earrings to), another winner will be chosen from the remaining entries using random.org.

After leaving a blog post comment, be sure to click on the Rafflecopter widget where it says "Leave A Blog Post Comment". A button will pop up that says "I Commented!" - in order to make your comment count and to gain your 5 entries, you've gotta click that button :) (The same goes for visiting Malfait Luciu Jewelry on Facebook - after visiting, come back, click on "Visit Malfait Luciu Jewelry on Facebook" on the widget, and click the "I Visited" button!) To know for sure that your entries have been counted, look at the top of the widget - if it says 6/6 at the top right, it means you've done everything right and have earned your six entries! :D MAKE SURE YOUR COMMENT ACTUALLY POSTS BELOW IN THE COMMENTS SECTION - If you click 'I Commented!' without leaving a comment, it doesnt count. If you have any problems leaving a comment let me know by emailing me at MalfaitLuciu (at) gmail (dot) com - If anyone has trouble getting their comment to appear, email the comment to me and I'll add it manually to ensure your five entries get counted :)

EDIT: I have made a slight change to the giveaway - instead of leaving a comment on this blog post, I've instead integrated the option to comment for five entries into the giveaway directly into the Rafflecopter widget. REST ASSURED ALL, everyone who has entered and commented already, your entries remain valid and you don't have to do anything further. Some people were encountering problems with commenting on the blog post, so I've switched it to this easier alternative. :)

I wish everyone the very best of luck, and thank all of you, my dear friends and followers, for the wonderful support you've all shown me with regards to my work. I'm on cloud nine right now- you all inspire me to keep creating, keep trying new things, and I am so very grateful. :)

Thank you all, and I wish you all the best of luck! :) And don't forget- if you don't end up being the lucky winner, you can always stop by my little jewelry shop for a look around- who knows, you may find something that speaks to you, and I'd be thrilled for a little visit :)

Have fun!

a Rafflecopter giveaway


Tuesday, July 17, 2012

Fortune Teller Beads

So, recently I discovered a free PDF for Diane Fitzgerald's awesome Fortune Teller Beads. The PDF contains instructions for a 19mm bead, but after some playing around, I was able to modify the design to work with a 14mm bead and two 20-22mm marbles I've had around for awhile. If you're interested, you can download the instructions here, along with instructions for two other projects.

This is my first go, using transparent lavender and coppery-gold seeds for the netting, and a plastic iridescent 14mm bead for the core. The design allows for room to add bits at either end of the bead, so I stitched a purple glass drop to the bottom and a purple glass bead to the top, with a few more coppery seeds that I aim to turn into the bail for a necklace. I think that since the bead is rather ornate, I'll go clean and simple on the necklace part.

I'm in love with this technique- it's easy, it works up quickly, and at the end you get to gather up all the seeds on each end into a tight circle, and it's really really satisfying to watch them tighten up around the bead when you pull it tight, haha.

Here's my two large beaded marbles- I did the blue one first. I had to modify the design a bit by altering the bead counts in each netting stitch and then adding one seed between each seed at the top and bottom where the netting 'gathers'. I thought the blue one looked a little naked, so I added transparent purple and silver beads in between the 'windows' that the netting creates. I'm not thrilled with the look, but it was fun nonetheless.

The red one I really love :D I used coppery size 8/0 seeds at the intersection points in the netting, and i like the look it gives. I'm imagining a tassle of fringe hanging off the bottom- I'm not good at maintaining the right tension on fringe, so that will be good practice :)

That's all for now. Today I'll leave you with Trinity having a conversation with me. 'Til Next Time! :)


Saturday, June 30, 2012

Leaf Flower Mini Tutorial

Hello again. Two posts in two days? Holy shit!

Today is a little tutorial using Czech glass leaf beads. I fucking love these things. I haven't figured out what the allure is- but there's just something about them that makes me NEED TO OWN THEM. Needless to say, I have a borderline-embarrassingly huge collection of them- embarrassing because I don't think I've EVER used one in a piece. No shit.

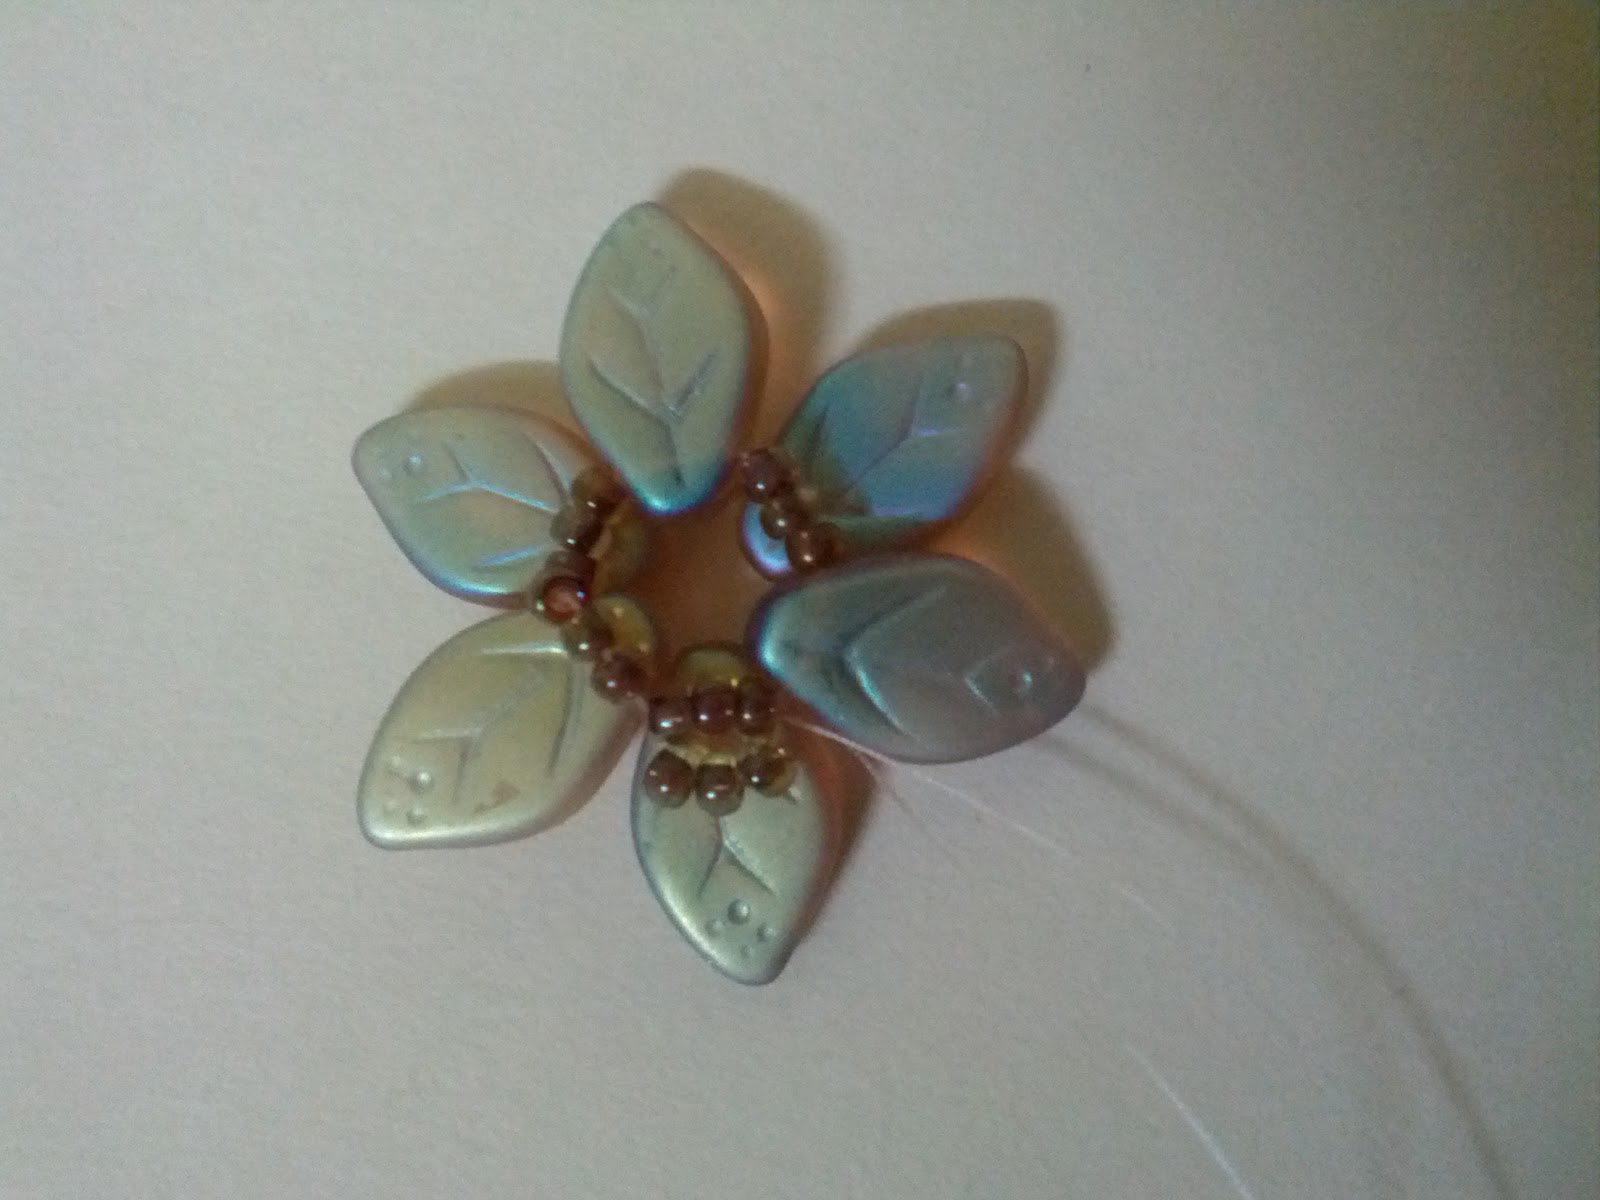
Well, I fixed that with a little flowery centerpiece made entirely from beads from my tube of Miyuki Wheatberry Hearty Bead Soup that my husband bought me awhile back. (I love this mix- there's druks, small flowers, leaves, cubes, fringe beads, bugles, and four or five different types of round seed beads in various colors.)

Again, as always, please forgive the odd blurry photo. I desperately need a tripod. Also, partway through the tutorial I switched from a black background to a white one- messy, I know. Please let me know if you have any questions or if anything's unclear.

Since this is a mini-tutorial, I'm not going to spell out every single step to you. This tutorial assumes you are familiar and comfortable with ladder stitch.

❦  ❦  ❦

Note: this tutorial is protected by an International Creative Commons Attribution-NonCommercial-ShareAlike licence. This means that you are free to post this wherever you like as long as you give proper Attribution (that is, to me, Jet Kosanke, and my website, malfaitluciu.blogspot.com), it may not be used commercially (you're not allowed to make money off it, that is, sell this tutorial to other people for money), and you're free to make changes to it as long as you also share it under these same restrictions (that is, you still give Attribution to me, you don't sell it, and you allow it to be shared freely.) For more information, click the Creative Commons link at the end of the tutorial.

By the way- NonCommercial doesn't mean you can't sell works you make using this tutorial. If you make a necklace, bracelet, or whatever using this tutorial, feel free to sell it- however, you may not mass-produce it, and the Attribution part still applies, that is, you still have to attribute the design to me.

If you're unsure if what you want to do is allowed, just ask me! I'm really pretty laid back about things like this :) I'd rather share my knowledge and discoveries for free so others can learn than charge money for my tutorials. With all that said, on to the good stuff! :)

❦  ❦  ❦


Click on any image to view a larger version. On with the show!


Materials
  • Your favorite needle
  • Your favorite thread
  • Six 12mm x 7mm Czech pressed glass leaf beads
  • One 6mm Czech druk or other round bead (7mm would work fine too, in fact, probably better)
  • 36 11/0 round seed beads (cylinders work too but I don't think they look as good as round ones)
  • Your favorite music
  • A nice cold pomegranate martini (optional)

Step One


String one leaf bead, three seeds, one leaf, three seeds, one leaf, three seeds on a comfortable length of thread. Stitch through all the beads again  and then knot to form a nice tight little circle, as shown.

Work your thread through the beads so it is exiting a leaf bead.


Step Two


String three seeds, then go through the same leaf your thread is exiting, as shown.


Step Three


Pull your thread through, making sure the three seeds snug up against the top surface of the leaf, as shown. (This is ladder stitch)

Stitch through the three seeds next to the leaf your thread is exiting, then through the next leaf. Repeat the above step, stringing three beads and ladder stitching to the top of that leaf.

Repeat for the third leaf.


Step Four


Position your thread so that it's exiting a set of three seeds on top of one of the leaves, as shown.


Step Five


String one leaf bead, then stitch through the three seeds on top of the next leaf, as shown.


Step Six


Repeat this step twice more, adding two more leaf beads. 

Position your thread so it is exiting one of the top-level leaf beads (which I mistakenly didn't show in the photo)


Step Seven


Flip the beadwork over.

Stitch through the three seeds beneath the leaf bead your thread is exiting.


Step Eight


Flip the beadwork over again. Stitch through the leaf bead above the three seeds your thread is exiting.

Repeat steps seven and eight twice, ladder stitching each top level leaf bead with the three seeds directly below.

Position your thread so it is coming out of one of the top level leaf beads.


Step Nine


String three seeds, then go back through the leaf bead your thread is exiting, as shown.

(In the photo, the thread on the left is the working thread, and the thread on the right is the tail thread)


Step Ten


Stitch through the three existing seed beads on top of the leaf bead next to the one your thread is exiting.


Step Eleven


String three seeds, then stitch back through the three seeds your thread is exiting.


Step Twelve


Repeat step eleven twice more, by working your thread through the next leaf and three seeds, adding three seeds, and ladder stitching them to the seeds your thread is exiting.

Position your thread so it is exiting a set of three seeds ON TOP of one of the upper layer leaf beads.


Step Thirteen


Stitch through the set of three seeds that is stitched to the seeds on top of the next lower level leaf bead.

Then, stitch through the three seeds on top of the leaf bead after that.

Repeat around the flower until you have created a circle of eighteen seed beads on top of the leaf beads. God I hope that made sense.


Step Fourteen


Position your thread so it is exiting the middle seed of the set of three seeds on top of the next leaf bead.


Step Fifteen


String your druk or round bead, skip eight beads, and stitch through the ninth bead, so your thread is exiting the seed bead directly across the one your thread is exiting.


Step Sixteen


Stitch back down through the druk or round.


Step Seventeen


Stitch back through the seed bead your thread was exiting in step fourteen.

That's it! Knot, work your thread ends in, and trim.

At this point, you can leave it like this, or you can do what I plan on doing, which is stitching a square stitched ring band two seeds wide to turn this into a cute little ring. :)


If you create something using this tutorial, I'd love to see it! Email me photos of your work (with a link to your blog if you have one) to malfaitluciu@gmail.com - I'd like to create a gallery page on my blog featuring your creations made using this tutorial (or any of my tutorials) with a link back to your blog, too :) Don't be shy, let me show off your work! :)


Creative Commons License


I'll leave you today with Neo and Trinity losing their minds over a handful of clovers (we call it 'kitty salad') (*UPDATE* I have since learned that clovers are not a good treat for kitties- there is a substance in them that can make them sick. So, Neo and Trinity don't get clover treats anymore; just plain old perfectly safe cat-grass. So just for your info - don't feed your kitties clovers like I did! Thankfully Neo and Trinity seemed to have escaped any ill-effects. No more clovers for them!)


'Til Next Time~!


Friday, June 29, 2012

Fishtail Tutorial

Hello! It's been awhile, I know, but I have a new tutorial now to make up for my absence. I came up with this design just from fiddling around with some short bugles and some seeds yesterday, and ended up with a pretty nifty design, if I do say so myself. It's sculptural and dramatic, but really quite easy to stitch- it works up quickly, too.


The lovely ladies over at the OTTBS facebook page inspired me to name this 'Fishtail', which I think makes perfect sense :D So, let's get started. I apologize in advance for some of the blurry pics, but i think you can still see what's going on with them. As always, if you have any questions or if anything is unclear, please let me know!

❦  ❦  ❦

Note: this tutorial is protected by an International Creative Commons Attribution-NonCommercial-ShareAlike licence. This means that you are free to post this wherever you like as long as you give proper Attribution (that is, to me, Jet Kosanke, and my website, malfaitluciu.blogspot.com), it may not be used commercially (you're not allowed to make money off it, that is, sell this tutorial to other people for money), and you're free to make changes to it as long as you also share it under these same restrictions (that is, you still give Attribution to me, you don't sell it, and you allow it to be shared freely.) For more information, click the Creative Commons link at the end of the tutorial.

By the way- NonCommercial doesn't mean you can't sell works you make using this tutorial. If you make a necklace, bracelet, or whatever using this tutorial, feel free to sell it- however, you may not mass-produce it, and the Attribution part still applies, that is, you still have to attribute the design to me.

If you're unsure if what you want to do is allowed, just ask me! I'm really pretty laid back about things like this :) I'd rather share my knowledge and discoveries for free so others can learn than charge money for my tutorials. With all that said, on to the good stuff! :)

❦  ❦  ❦

Click on any image to view a larger version.

Materials:
  • your favorite needle and thread
  • size 11/0 cylinder beads
  • 5mm bugles (I believe. The bugles need to be as long as two cylinders are high.)
  • OPTIONAL: fringe beads, drops, or magatamas. even daggers would work and look nifty
  • your favorite music
  • an icy mojito or margarita- or three (also optional, but nice to have)

Step One


String four seeds on a comfortable length of thread. I like to use one 'wingspan', personally.


Step Two


Go through all the beads again to form a loop.


Step Three


Pull tight and knot securely.


Step Four


Needle through the two beads next to where you knotted and pull through.


Step Five


Pick up two seeds, then go back down the two beads you went through in the last step.


Step Six

Go back through the two beads you just added.


Step Seven

Continue in this way until your strip is ten beads long.


Step Eight

Now we start the herringbone stitch. Pick up two bugles, and then stitch down through the two beads next to the beads your thread is coming out of.


Step Nine

Stitch up through the two beads next to the beads your thread is coming out of.


Step Ten

Repeat steps eight and nine across the row until you have stitched a total of five stitches.


Step Eleven

Here we're going to 'step up'. Instead of the way it's usually done in herringbone, where you add a bead, then stitch up through the bead above the one your thread is coming out, we're going to do something different.

Stitch up through the ONE bead next to the one your thread is coming out of. Don't stitch through both seeds, just the one.

(Of course, if you wanted to do it the other way and add a bead, go for it! I just chose not to)


Step Twelve

Now, Stitch up through the bead DIAGONAL from the bead your thread is coming out of.


Step Thirteen

Now, needle through the bugle above the bead your thread is exiting.


Step Fourteen

Now that we've 'stepped up', we're going to stitch another row of herringbone.

Add two bugles, go down through the bugle next to the one your thread is exiting. (Don't go down through the seeds below it, just go through the one bugle.)


Step Fifteen

Stitch up through the bugle next to the one your thread is exiting.


Step Sixteen

Repeat steps fourteen and fifteen till you reach the end of the row. Your thread should be exiting the last bugle in the previous row, as shown.


Step Seventeen

Now we have to reverse the direction our thread is going in. Locate the thread 'bridge' between the last two seed beads in the second row of beads. You're going to slip your needle UNDER this thread 'bridge', then pull your thread all the way through. This anchors your thread so that you can go back the way you came through the bugle your thread is coming out of.

I like to call this a 'turnaround'.


Step Eighteen

Stitch up through the two bugles on the edge of your strip, as shown.

Then, stitch a row of herringbone in bugles- five stitches.


Step Nineteen

Now we're going to do a 'turnaround' again. It's easier this time, because the herringbone gives you a little gap between the bugles that is easy to put your needle through. Put your needle through the gap between the first two bugles in the first row of bugles, as shown- then pull your thread through.


Step Twenty


Now, stitch up through the two bugles on the edge of the strip, as shown.


Step Twenty One

This row is still herringbone, but with a small addition. Pick up two bugles and stitch down through the bugle next to the one your thread is exiting, as shown. DON'T go through the next bugle in line, though.


Step Twenty Two

Here we add one seed bead. By now you can probably see how the beadwork is starting to 'fan out'- we're just filling in some of the space between the columns of herringbone.


Step Twenty Three

Now we go up through the next bugle in line. We're going to repeat this across the whole row.


Step Twenty Four

When you get to the end of the row, do a 'turnaround'.


Step Twenty Five

We're going to do the same thing in this row as the last row, except we're adding two seeds between each stitch instead of just one. Pick up two bugles, go through the bugle next to the one your thread is exiting, pick up two seeds, go up through the next bugle, and repeat.


Step Twenty Six

At the end of the row, do a 'turnaround'.


Step Twenty Seven

Instead of adding two bugles like usual here, we're going to add one fringe bead (or drop or magatama or dagger or whatever you like) and go back down the bugle next to the one your thread is exiting.

NOTE: The fringe bead is optional. If you don't have fringe beads or don't want to add fringe beads at all, just go back down through the next bugle as usual without adding any bead. It looks just as nifty without a fringe or drop as it does with. It's up to you :)


Step Twenty Eight

Now, just like the last row, we're going to pick up seeds before going up through the next bugle- THREE beads this time. Don't get carried away, though! We aren't doing this across the entire row.

After you stitch up through the next bugle (the third one in this row) instead of adding beads, go back down through the next bugle without adding any beads.


Step Twenty Nine

At this point, we're creating the base row for the next 'fin'.

Pick up two seeds, then go back down the bead your thread is exiting.

This is the same concept as what we did with the very first row of seeds at the beginning, but we're substituting the existing bugle for two seeds. I hope that made sense.


Step Thirty

Stitch up through the two beads you just added.


Step Thirty One

We're going to repeat step twenty nine and thirty here. Pick up two seeds, go back up through the beads added in step thirty, then go back down through the two seeds you added in this step.


Step Thirty Two

Stitch up through the next bugle in the row.


Step Thirty Three

Stitch down through the last two seeds added.


Step Thirty Four

Stitch back up the bugle next to where your thread is exiting, then down through the next bugle in the row.


Step Thirty Five

Now we repeat steps twenty nine through thirty four. Almost done with the fin!


Step Thirty Six

Now, like at the beginning of this row, we pick up three seeds, then stitch up through the next bugle in the row.


Step Thirty Seven

String a fringe bead (or don't), go down through the last bugle in the row, do a 'turnaround', then work your needle back through the existing beadwork until your thread is coming out of the bugle shown in the image.

Your first fin is done!


Step Thirty Eight

Now, we add two bugles and go down through the bugle next to the one your thread is exiting. This is the same concept as our first row of herringbone at the beginning.


Step Thirty Nine

Stitch up through the two seed beads next to the bugle your thread is exiting.


Step Forty

Continue herringbone stitches with bugles across the row- five stitches total.


Step Forty One

From here, repeat from step fourteen until your strip of fishtails is as long as you like :)


And there you have it! Whew. I haven't finished a bracelet with this method yet, but I'm going to continue off of what I stitched up for this tutorial. I have a clever idea for a clasp, but I don't know if I can pull it off, so I won't say yet what it is. I'll be sure to post pictures when it's finished.


If you create something using this tutorial, I'd love to see it! Email me photos of your work (with a link to your blog if you have one) to malfaitluciu@gmail.com - I'd like to create a gallery page on my blog featuring your creations made using this tutorial (or any of my tutorials) with a link back to your blog, too :) Don't be shy, let me show off your work! :)


Creative Commons License


Until then, I'll leave you with this; my mother's kitty Jinx, sitting in his favorite kitty-hammock. I love love love his perpetually sleepy eyes :3


'Til Next Time!