Showing posts with label bead weaving. Show all posts

Tuesday, July 17, 2012

Fortune Teller Beads

So, recently I discovered a free PDF for Diane Fitzgerald's awesome Fortune Teller Beads. The PDF contains instructions for a 19mm bead, but after some playing around, I was able to modify the design to work with a 14mm bead and two 20-22mm marbles I've had around for awhile. If you're interested, you can download the instructions here, along with instructions for two other projects.

This is my first go, using transparent lavender and coppery-gold seeds for the netting, and a plastic iridescent 14mm bead for the core. The design allows for room to add bits at either end of the bead, so I stitched a purple glass drop to the bottom and a purple glass bead to the top, with a few more coppery seeds that I aim to turn into the bail for a necklace. I think that since the bead is rather ornate, I'll go clean and simple on the necklace part.

I'm in love with this technique- it's easy, it works up quickly, and at the end you get to gather up all the seeds on each end into a tight circle, and it's really really satisfying to watch them tighten up around the bead when you pull it tight, haha.

Here's my two large beaded marbles- I did the blue one first. I had to modify the design a bit by altering the bead counts in each netting stitch and then adding one seed between each seed at the top and bottom where the netting 'gathers'. I thought the blue one looked a little naked, so I added transparent purple and silver beads in between the 'windows' that the netting creates. I'm not thrilled with the look, but it was fun nonetheless.

The red one I really love :D I used coppery size 8/0 seeds at the intersection points in the netting, and i like the look it gives. I'm imagining a tassle of fringe hanging off the bottom- I'm not good at maintaining the right tension on fringe, so that will be good practice :)

That's all for now. Today I'll leave you with Trinity having a conversation with me. 'Til Next Time! :)


Saturday, June 30, 2012

Leaf Flower Mini Tutorial

Hello again. Two posts in two days? Holy shit!

Today is a little tutorial using Czech glass leaf beads. I fucking love these things. I haven't figured out what the allure is- but there's just something about them that makes me NEED TO OWN THEM. Needless to say, I have a borderline-embarrassingly huge collection of them- embarrassing because I don't think I've EVER used one in a piece. No shit.

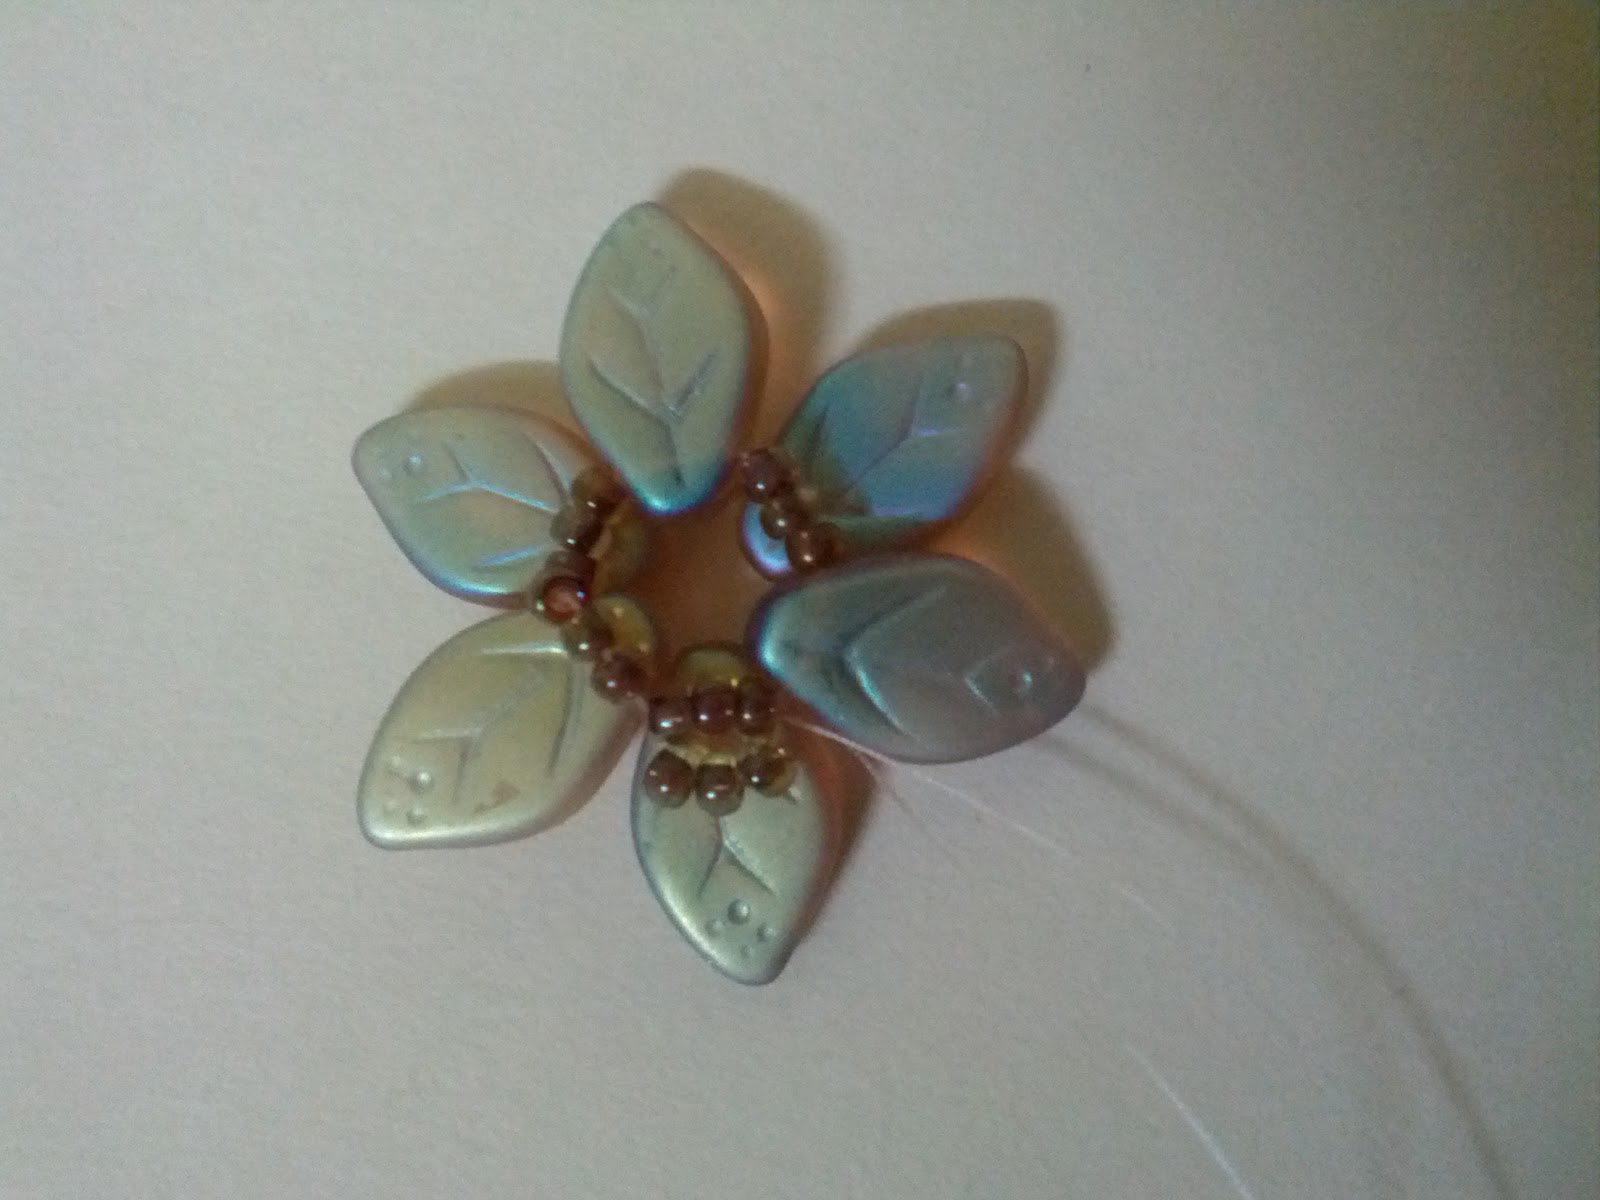
Well, I fixed that with a little flowery centerpiece made entirely from beads from my tube of Miyuki Wheatberry Hearty Bead Soup that my husband bought me awhile back. (I love this mix- there's druks, small flowers, leaves, cubes, fringe beads, bugles, and four or five different types of round seed beads in various colors.)

Again, as always, please forgive the odd blurry photo. I desperately need a tripod. Also, partway through the tutorial I switched from a black background to a white one- messy, I know. Please let me know if you have any questions or if anything's unclear.

Since this is a mini-tutorial, I'm not going to spell out every single step to you. This tutorial assumes you are familiar and comfortable with ladder stitch.

❦  ❦  

Note: this tutorial is protected by an International Creative Commons Attribution-NonCommercial-ShareAlike licence. This means that you are free to post this wherever you like as long as you give proper Attribution (that is, to me, Jet Kosanke, and my website, malfaitluciu.blogspot.com), it may not be used commercially (you're not allowed to make money off it, that is, sell this tutorial to other people for money), and you're free to make changes to it as long as you also share it under these same restrictions (that is, you still give Attribution to me, you don't sell it, and you allow it to be shared freely.) For more information, click the Creative Commons link at the end of the tutorial.

By the way- NonCommercial doesn't mean you can't sell works you make using this tutorial. If you make a necklace, bracelet, or whatever using this tutorial, feel free to sell it- however, you may not mass-produce it, and the Attribution part still applies, that is, you still have to attribute the design to me.

If you're unsure if what you want to do is allowed, just ask me! I'm really pretty laid back about things like this :) I'd rather share my knowledge and discoveries for free so others can learn than charge money for my tutorials. With all that said, on to the good stuff! :)

❦  ❦  


Click on any image to view a larger version. On with the show!


Materials
  • Your favorite needle
  • Your favorite thread
  • Six 12mm x 7mm Czech pressed glass leaf beads
  • One 6mm Czech druk or other round bead (7mm would work fine too, in fact, probably better)
  • 36 11/0 round seed beads (cylinders work too but I don't think they look as good as round ones)
  • Your favorite music
  • A nice cold pomegranate martini (optional)

Step One


String one leaf bead, three seeds, one leaf, three seeds, one leaf, three seeds on a comfortable length of thread. Stitch through all the beads again  and then knot to form a nice tight little circle, as shown.

Work your thread through the beads so it is exiting a leaf bead.


Step Two


String three seeds, then go through the same leaf your thread is exiting, as shown.


Step Three


Pull your thread through, making sure the three seeds snug up against the top surface of the leaf, as shown. (This is ladder stitch)

Stitch through the three seeds next to the leaf your thread is exiting, then through the next leaf. Repeat the above step, stringing three beads and ladder stitching to the top of that leaf.

Repeat for the third leaf.


Step Four


Position your thread so that it's exiting a set of three seeds on top of one of the leaves, as shown.


Step Five


String one leaf bead, then stitch through the three seeds on top of the next leaf, as shown.


Step Six


Repeat this step twice more, adding two more leaf beads. 

Position your thread so it is exiting one of the top-level leaf beads (which I mistakenly didn't show in the photo)


Step Seven


Flip the beadwork over.

Stitch through the three seeds beneath the leaf bead your thread is exiting.


Step Eight


Flip the beadwork over again. Stitch through the leaf bead above the three seeds your thread is exiting.

Repeat steps seven and eight twice, ladder stitching each top level leaf bead with the three seeds directly below.

Position your thread so it is coming out of one of the top level leaf beads.


Step Nine


String three seeds, then go back through the leaf bead your thread is exiting, as shown.

(In the photo, the thread on the left is the working thread, and the thread on the right is the tail thread)


Step Ten


Stitch through the three existing seed beads on top of the leaf bead next to the one your thread is exiting.


Step Eleven


String three seeds, then stitch back through the three seeds your thread is exiting.


Step Twelve


Repeat step eleven twice more, by working your thread through the next leaf and three seeds, adding three seeds, and ladder stitching them to the seeds your thread is exiting.

Position your thread so it is exiting a set of three seeds ON TOP of one of the upper layer leaf beads.


Step Thirteen


Stitch through the set of three seeds that is stitched to the seeds on top of the next lower level leaf bead.

Then, stitch through the three seeds on top of the leaf bead after that.

Repeat around the flower until you have created a circle of eighteen seed beads on top of the leaf beads. God I hope that made sense.


Step Fourteen


Position your thread so it is exiting the middle seed of the set of three seeds on top of the next leaf bead.


Step Fifteen


String your druk or round bead, skip eight beads, and stitch through the ninth bead, so your thread is exiting the seed bead directly across the one your thread is exiting.


Step Sixteen


Stitch back down through the druk or round.


Step Seventeen


Stitch back through the seed bead your thread was exiting in step fourteen.

That's it! Knot, work your thread ends in, and trim.

At this point, you can leave it like this, or you can do what I plan on doing, which is stitching a square stitched ring band two seeds wide to turn this into a cute little ring. :)


If you create something using this tutorial, I'd love to see it! Email me photos of your work (with a link to your blog if you have one) to malfaitluciu@gmail.com - I'd like to create a gallery page on my blog featuring your creations made using this tutorial (or any of my tutorials) with a link back to your blog, too :) Don't be shy, let me show off your work! :)


Creative Commons License


I'll leave you today with Neo and Trinity losing their minds over a handful of clovers (we call it 'kitty salad') (*UPDATE* I have since learned that clovers are not a good treat for kitties- there is a substance in them that can make them sick. So, Neo and Trinity don't get clover treats anymore; just plain old perfectly safe cat-grass. So just for your info - don't feed your kitties clovers like I did! Thankfully Neo and Trinity seemed to have escaped any ill-effects. No more clovers for them!)


'Til Next Time~!


Saturday, October 22, 2011

Donut Tutorial

Time for my first tutorial! I hope someone finds it useful. Please forgive the blurriness.... I'm badly in need of a tripod. Let me know if anything needs to be clarified; I'm new at this tutorial business :)

❦  ❦  

Note: this tutorial is protected by an International Creative Commons Attribution-NonCommercial-ShareAlike licence. This means that you are free to post this wherever you like as long as you give proper Attribution (that is, to me, Jet Kosanke, and my website, malfaitluciu.blogspot.com), it may not be used commercially (you're not allowed to make money off it, that is, sell this tutorial to other people for money), and you're free to make changes to it as long as you also share it under these same restrictions (that is, you still give Attribution to me, you don't sell it, and you allow it to be shared freely.) For more information, click the Creative Commons link at the end of the tutorial.

By the way- NonCommercial doesn't mean you can't sell works you make using this tutorial. If you make a necklace, bracelet, or whatever using this tutorial, feel free to sell it- however, you may not mass-produce it, and the Attribution part still applies, that is, you still have to attribute the design to me.

If you're unsure if what you want to do is allowed, just ask me! I'm really pretty laid back about things like this :) I'd rather share my knowledge and discoveries for free so others can learn than charge money for my tutorials. With all that said, on to the good stuff! :)

❦  ❦  


Click on any image to view a larger version.

This tutorial assumes you are familiar and comfortable with even count peyote stitch, stepping up in peyote stitch, and zipping up peyote stitch.

Materials:

  • Favorite thread
  • Favorite needle
  • Size 15 seed beads (I've used three different colors here, you can stick with one color if you like)
  • Size 11 seed beads (I'm using Czech and Japanese (Toho) seeds; I don't know how delicas would work with this pattern... yet :3)
  • Favorite music
  • A cup of warm tea or coffee (optional, but nice to have)

One last note: I am using a different color for each row of peyote stitch in hopes it can help make things clearer. Think of the donut having two sides that are mirror images of each other; a row of peyote in orange on one side will be matched with a row of orange peyote on the opposite side. It may make more sense to just look at the photos. Hmm.

First Step

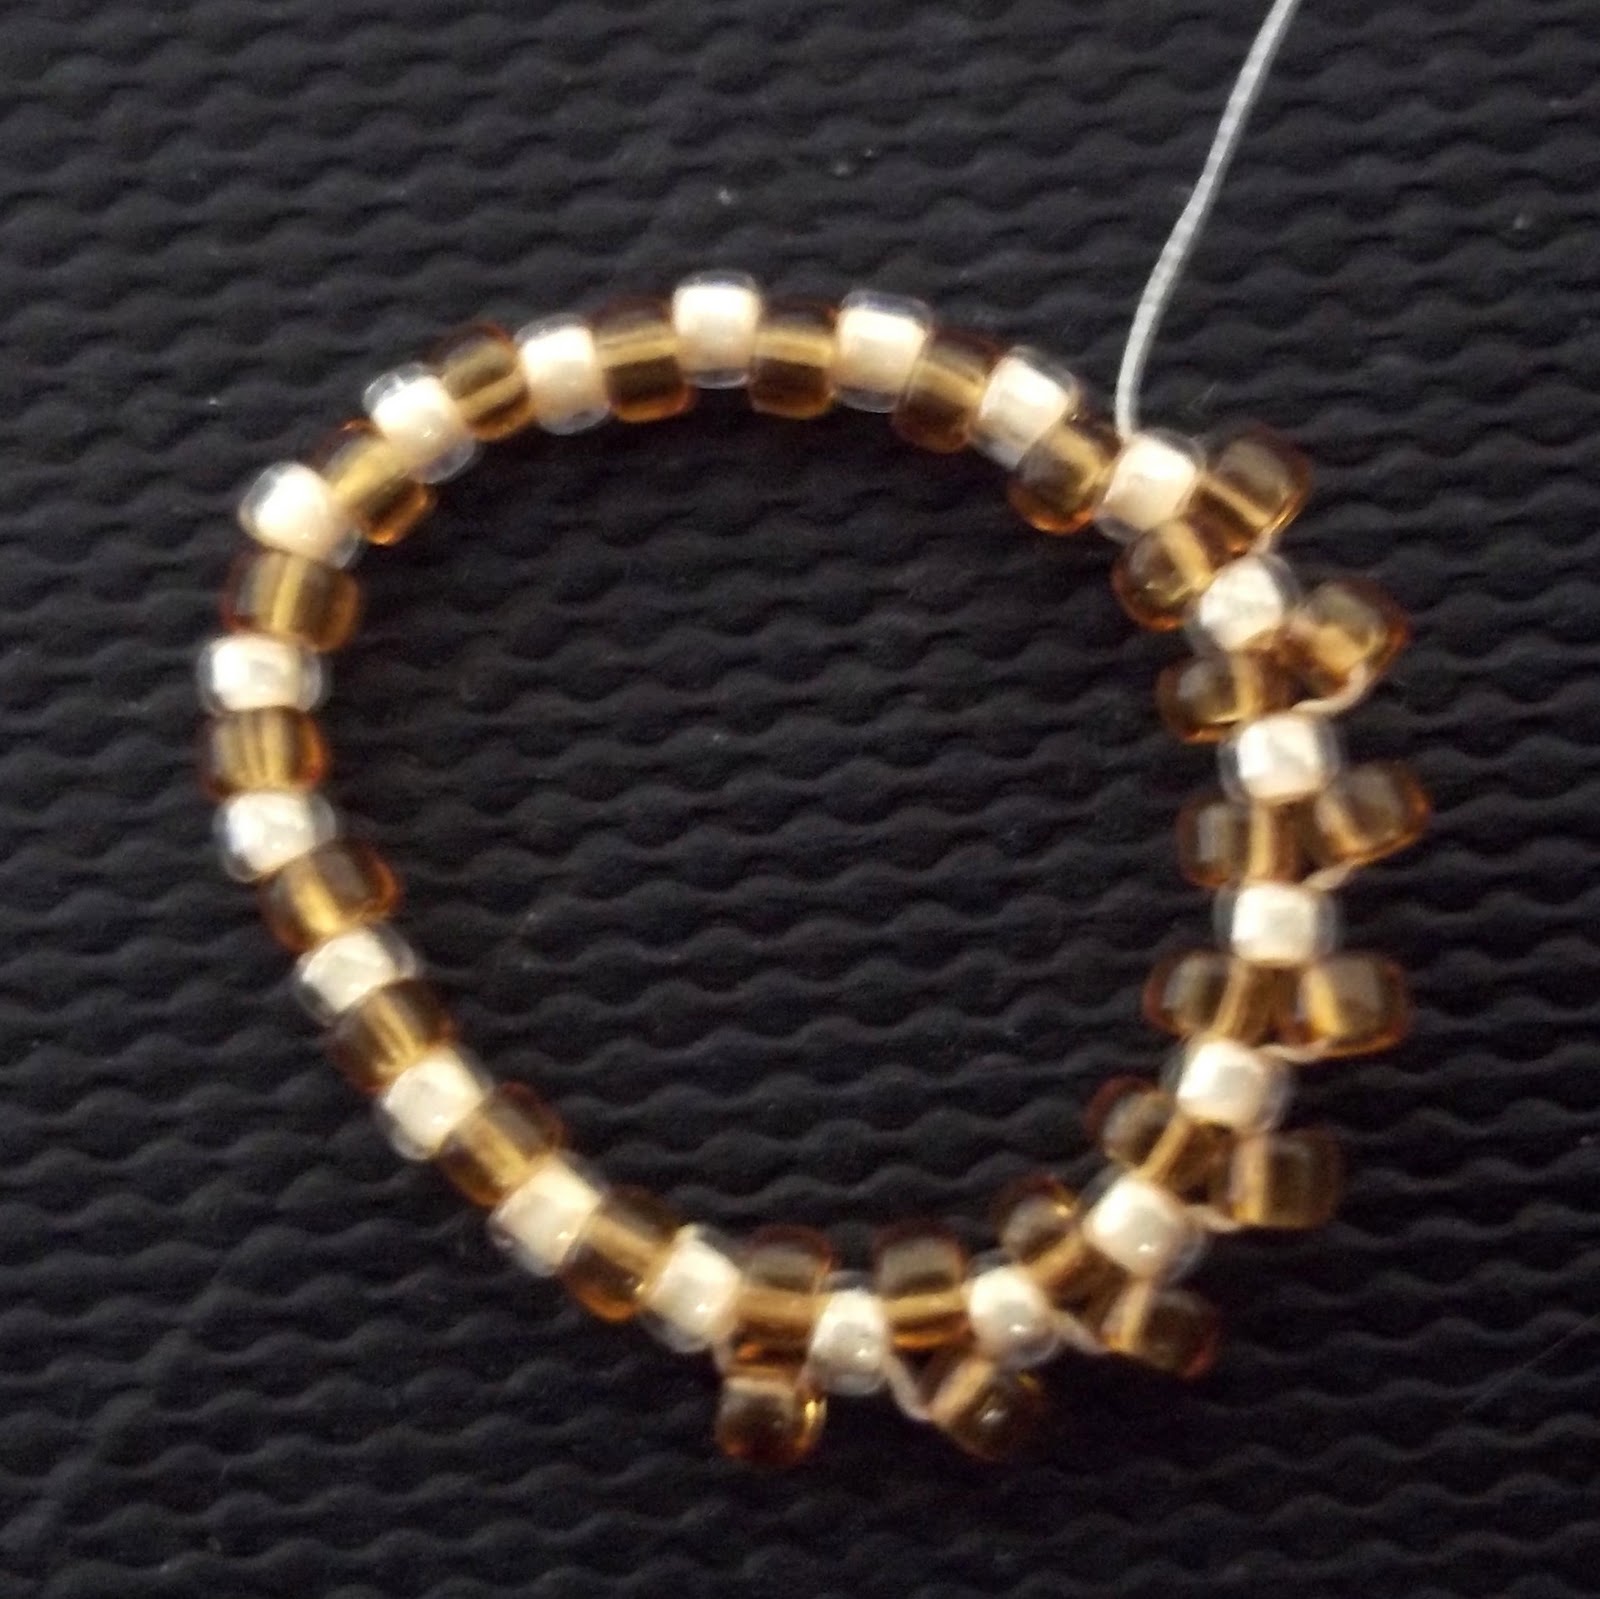
String a total of 40 size 15 seeds on a comfortable length of thread (one 'wingspan' of thread is more than enough for one donut and a few rows of embellishment). I've used alternating colors here in order to highlight individual rows of peyote later on. This isn't required, depending on the colors and patterns you want in your donut, but this tutorial is going to assume you've followed this color scheme.

Needle through all the beads again to form a loop. Knot here, needle through beads until your thread is coming out a cream colored bead.

When you knot, try not to make your ring too taut. You want a little bit of wiggle room in order to be able to get your needle in between these tiny beads.

At this point I personally like to weave in my tail thread and snip off the excess just to get it out of the way.

Second Step

Begin a row of peyote stitch. I've used brown seeds for this row. See how they mirror the brown beads strung in the first row? This is the start of each side of the donut. Think of the cream seeds as being the innermost edge of the 'hole' of the donut.


Third Step

After stitching the entire row, needle up through the first brown bead added in this row in order to 'step up'.


Fourth Step

Add another row of peyote stitch, shown here in green beads. At this point I use my finger to form the donut around. You'll want the strip you're forming to lay flat against your finger from here on in. Just keep even firm tension, and press the beads down with your thumbtip every now and then.

When you get to the end of this row, instead of stepping up, you're going to needle through to the other side of the beadwork, so your thread is coming out of a brown 'up' bead.


Fifth Step

Stitch a row of peyote on this side of the donut, (here in green) mirroring the row you stitched in step 4.

When you get to the end of this row, step up.


Sixth Step

Now we switch to size 11 seeds for the rest of the donut. Stitch a row of peyote (shown here in orange).


Seventh Step

When you get to the end of this row, don't step up. Instead, needle through to the other side of the beadwork so your thread is coming out of a green 'up' bead.


Eighth Step

Stitch a row of peyote here to mirror the row you stitched in step 6.

When you've completed this row, step up.

Almost done!


Ninth Step

Stitch a row of peyote, shown here in cream. This row will form the outer circumference of the donut.

When you've completed this row, step up.


Tenth Step

Time to zip up! Stitch through the orange bead opposite of the orange bead that's in front of the cream bead your thread is coming out of. Then, stitch through the next cream bead, the next orange bead on the opposite side, etc.

When zipping up, you're going to want to use pretty strong tension; enough to get the beads to 'lock' into place next to each other. Don't be afraid to pull hard; just make sure you keep the tension even.


Eleventh Step

When you've zipped up all the way around, your thread should be coming out of the same cream bead that your thread was coming out of at the beginning of step 10.

From here, your donut is complete! You can knot now and weave in the thread end if you like.


Embellishment

However, the last row of beads added (the cream 11s) forms a wonderful foundation for further embellishment.

Here, I've added three-bead picots in purple using the outermost row of cream beads on the donut. The possibilities here are endless. Add crystals, pearls, hell, you could even use that row as a foundation for some right angle weave.

Use your donut as a pendant on its own, as half of a toggle clasp, attach a bunch of them together for a bracelet (I have plans to do just that soon :3)... whatever you like!


And that's it! I hope this tutorial was helpful for someone. Again, please let me know if anything is confusing or needs clarification.

If you create something using this tutorial, I'd love to see it! Email me photos of your work (with a link to your blog if you have one) to malfaitluciu@gmail.com - I'd like to create a gallery page on my blog featuring your creations made using this tutorial (or any of my tutorials) with a link back to your blog, too :) Don't be shy, let me show off your work! :)

Creative Commons License

Today I'll leave you with Neo in a paper bag. 

'Til Next Time!

Tuesday, September 6, 2011

Functional Peyote


So, my husband suggested I bead something more functional than jewelry; a case/cover for my electronic cigarette (a much healthier alternative to 'analog' cigarettes). I looked at my ecig and thought 'tubular peyote would do the trick nicely!' I'm proud of myself- while I love the look of peyote, I find stitching it to be quite monotonous and tedious. It just doesn't work up as fast as I'd like.


But for a long time I've been telling myself I need to practice decreasing circular peyote, and I'm quite proud of myself for this little project. I thought about copping out and not beading an end 'cap'; rather just leave the work as an open tube, but I made myself do something scary, and surprised myself with the result.

The spiral pattern with the silver-lined delicas took me a couple of tries to get started correctly, and luckily just happened to work perfectly with the eighteen-bead-long circle (if that makes any sense). It also created a nifty little spiral pattern on the bottom where the decreases are (which themselves form a soft, pleasing to the eye hexagon. I love hexagons).

Funny I went with blues- blue is not exactly my most favorite color (I like greens and oranges). But the dark blue delicas I picked up specifically because they're so pretty- you may not be able to tell, but they have a pretty iridescent iris effect). The teal delicas seemed like they'd be a nice compliment (and lord knows I have way too many of those beads; I NEED to use them up already). The silver just made sense.

Overall, I'd say it's a success! I'll leave you with Neo and Trinity as babies, chilling in the window.

'Til Next Time!

Wednesday, August 31, 2011

Umbrella!

Good morning! I wasn't planning on posting something this early, but when I saw this, I couldn't contain my excitement. I stumbled upon a german beading blog called Perlenfieber (which google translate tells me means 'bead fever') and immediately noticed this incredible beaded umbrella!

I'm in love!

Of course this means I'm going to have to try making one myself. Too bad I don't have any of those wonderful playful colors! Perhaps next time I make a sale, I'll have to go shopping. I'm relatively confident that I can pull something like this off. I just wish it was my idea; isn't it adorable?


'Til Next Time!


Tuesday, August 30, 2011

Hello and Welcome!

Welcome to the first post of my blog! I've decided, after a week of ravenously browsing the web for as many beading blogs as I can find, that I'll dive in and give this blog thing a shot. I've been inspired, perhaps.

Since this is my first post, I figure I'd post what's been keeping me occupied currently. Yesterday, I had the pleasure of finding Operation Tackle That Bead Stash, a lovely blog with monthly 'Moodboards'; a collection of images featuring color combinations intended to inspire new beading creations, hopefully with the end result of using up some of the stash every beader inevitably has. This month's Moodboard had me very busy yesterday! Here you can see my boy Neo with my first creation inspired by it; an embellished right-angle-weave bracelet in purple, teal, and green (reminds me of a peacock!).


After the bracelet, I really got into the spirit of using up my stash with these two fun little rings. The one with the green band used up all of those green seeds I had left, save for just one! The tiny purple crystals surrounding the blue bead were also a good use of my stash- those six beads were the only ones of that type I had!

The other ring used up a good bit of my teal delicas- a good thing, since for some reason I have three tubes of those beads. (Why? I hardly ever use them! I guess I just really like the color.)

Overall, I'm surprised how much this month's Moodboard has inspired me; purple, green, and teal are generally not colors I like to see together (they seem almost too playful for my tastes), but I've come up with not one, but three different projects using them- and I'm not done yet! I plan on at least one more ring, this time with a purple band, using the tube of delicas you can see above.

I'm kind of glad I found Operation Tackle That Bead Stash when I did, at the end of the month. That means that a new Moodboard is right around the corner. I'm excited to see what it is!

Oh, and a final note: I highly recommend joining their Facebook group. I recieved a very warm welcome, and from what I can tell, it seems to be pretty active.

'Til Next Time!