Showing posts with label Tutorial. Show all posts

Friday, March 31, 2017

How to Apply a Borax Patina on Copper

Hello everyone!

Yesterday I made a post about how to apply an ammonia patina to copper. In that post I mentioned a borax patina that can be done quickly and easily, so I decided to write up this little how-to :)


I love this method because it's fast and easy and produces some lovely colors, like the ones in my Copper Heart Earrings. If you like instant gratification as much as I do, then this technique is for you!


Materials and Tools
  • Borax (can be found in the laundry/household cleaners aisle in the grocery store - look for it on the bottom shelves)
  • A small container for the solution you'll mix up, I use a ramekin
  • A soldering/heat proof surface. I use a charcoal brick atop a fire brick
  • A torch - I use a small butane torch
  • A pair of cross-lock tweezers
  • Very hot water (not boiling hot, but as hot as you can get it from your faucet)
  • A piece of copper, of course :D

The first thing you have to do is make sure your copper is clean. Some scrub with a toothbrush and Dawn soap, but I just wipe it down with some rubbing alcohol and that seems to work fine.

Once your piece is cleaned, set it aside and mix your borax solution. In your small container/ramekin, pour in some very hot water (again, not boiling, but it should be a little too hot to the touch). Then, sprinkle in your borax. I personally put a ton of borax in my solution- often so much that not all of it dissolves in the water- I like to super saturate the water with the borax.

You want to work a little quickly here because you don't want your borax solution to cool off too much. Take your copper and set it on your heat-proof surface, and make sure your cross-lock tweezers are handy. With your torch, heat the bejeezus out of your copper. You want to heat it until it glows cherry red. Quickly grab your cross-lock tweezers and use them to grab the piece of copper, and quench it in your borax solution. You want to work fast because you want your copper to be as hot as possible when you quench it.

When you quench your copper, something pretty cool happens! When you first dunk it in the borax solution, the copper will hiss as it cools down rapidly and will turn kind of gray-ish. But just a moment after that, you hear another hiss and can literally see the red patina appear right before your eyes! This is my favorite part, haha! Ive made a video just so you can see how satisfying that double hiss is! :D


I hope you found this little guide helpful! The really great thing about this method is if you don't like the patina you end up with, all you have to do is toss it in the pickle pot for awhile and it will come back copper colored so you can retry your borax patina as many times as you like until you achieve the look you want.

For now I'll leave you with a pic of me holding my mom's kitty Jinx on the day we brought him home. :)


Til Next Time!

Thursday, March 30, 2017

How to Use Ammonia and Salt to Patina Copper

Hello everyone!

Lately I've been playing with various techniques of applying patinas to copper. I'm having a blast playing with heat patinas and borax patinas, but I get the most satisfaction from ammonia and salt patinas.


I thought it might be fun to do a little tutorial on the way I apply patina to my pieces. I'll focus on ammonia and salt patinas for now. They are deceptively easy to achieve! Let me walk you through my process :)

Materials:
  • The copper piece you want to patina 
  • A plastic container, for example one of those disposable food storage containers. It must have a lid! I use a large one but a smaller one would work just fine; but it must be a container you're willing to sacrifice and never use to store food in again
  • Ammonia - all I could find at the store was the lemon scented kind but it works just as well as plain old ammonia
  • Table salt
  • Wire - I use 20 gauge base metal wire
  • Something pointy and metal that can be heated - I use an old needle file
  • A small cheap paint brush

The first step is to create your fume container out of your food storage container. Use your pointy tool/needle file, and hold the tip over a flame to make it hot. Then use it to melt a hole in the side of your container. Melt two more holes beside the first one and try to make them even. Repeat this on the other side of the container, making sure it's directly across from your first set of holes and also at the same height as the first holes.


Now, take a few lengths of wire and feed them through the holes, one side to the other. Bend down the excess wire so it doesn't slide right back out. Repeat for the other two pairs of holes. In my container below, you can see the three wires spanning the width of my container.


At this point, pour in a little ammonia. You don't need a lot! I have maybe a centimeter of ammonia in my container. It's the ammonia fumes that interact with the salt and produce the patina, not the liquid itself, so you don't need a lot.                    


CAUTION
Ammonia fumes are very, very strong and are not something you want to be inhaling. It can also hurt your eyes, so please work in a very well ventilated place with safety goggles!


Next, take your copper piece and paintbrush and brush it with some of the ammonia, then set it on top of the wires in your fume container so it's suspended above the ammonia. 

Next, while the piece is still wet, sprinkle a VERY generous amount of table salt onto your piece.


Now comes the waiting. Put the lid on your fume container and carefully move it to a place where it will not be disturbed.

You'll notice after a little while, the salt has turned blue! It's an encouraging sign, but don't get too excited - at this point the blue is only on the salt, not the copper piece beneath.


After leaving the whole assembly alone for awhile, the patina on the copper will slowly build. This takes time; I usually leave my items in the fume container for three days, although you can go longer if you like.

Once the three days are up, it's time to remove your piece. Rinse off the salt crust with a little water, and take a look at your gorgeous patina!


At this point I use a couple coats of ProtectaClear to protect and preserve the patina. Now you're ready to use your patina pieces in whatever jewelry project you have in mind :) Here's another example of this method:


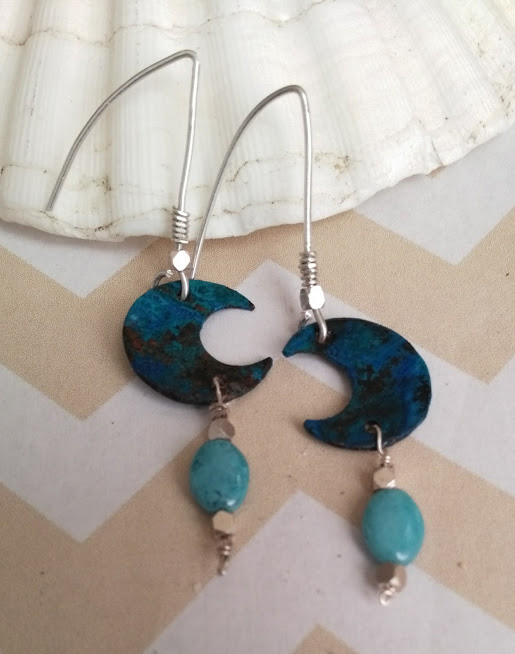
I hope this little mini tutorial is useful! Next I think I'd like to document the process of adding a borax patina to your copper pieces, as I've done here with these earrings:


It's a great method that gives a lovely mottled red color to your copper, and an added bonus is there's no waiting for days for it to develop, it shows up right away! :)

For now, I'll leave you with my sweet boy Neo, keeping me company in my studio (my cats are so spoiled, they get their own little pillow to sit on on my work table! But mainly I put it there because otherwise they like to hop up and lay right down on the table on top of all my work! haha)


Til Next Time!


Wednesday, November 25, 2015

The Fishtail Pattern - Finished, but not by Me!

Hi everyone!

I just had to post the coolest thing that happened only recently. Some of you may recall my free beaded Fishtail tutorial. 

I had planned to complete the design, but just never really got around to it.


But thankfully for me, someone else did! Amy Bradley contacted me on the Malfait Luciu Facebook Page. She showed me a fishtail bracelet she'd made, but she'd also finished both ends and a clasp. Her chosen color palette is just perfect, too.


Isn't it gorgeous? I love those little green fringe beads and the very pretty way she created the sort of 'checkerboard' effect on both ends to finish them off.

Thank you so much, Amy, for showing me your work! And to anyone who uses any of my free tutorials, I do hope you'll share your work to me! Post your completed pics on the Malfait Luciu FB page, and I'll feature them here on the blog. Got a variation you tried out? Show me! I hope at one point I'll be able to dedicate a page on this blog specifically from works by others :)

Thanks again, Amy!

Sunday, September 6, 2015

Tutorial - Zoe's Ring

Hello everyone!

I've got a new tutorial for you today; a ring set with a cabochon. I've named it after my niece who is just awesome :3

This one might appear kind of complicated but really it's pretty straightforward. Hope you enjoy it, and if you make one, please show me! :)


❦  ❦  ❦

Note: this tutorial is protected by an International Creative Commons Attribution-NonCommercial-ShareAlike licence. This means that you are free to post this wherever you like as long as you give proper Attribution (that is, to me, Jet Kosanke, and my website, malfaitluciu.blogspot.com), it may not be used commercially (you're not allowed to make money off it, that is, sell this tutorial to other people for money), and you're free to make changes to it as long as you also share it under these same restrictions (that is, you still give Attribution to me, you don't sell it, and you allow it to be shared freely.) For more information, click the Creative Commons link at the end of the tutorial.By the way- NonCommercial doesn't mean you can't sell works you make using this tutorial. If you make a necklace, bracelet, or whatever using this tutorial, feel free to sell it- however, you may not mass-produce it, and the Attribution part still applies, that is, you still have to attribute the design to me.If you're unsure if what you want to do is allowed, just ask me! I'm really pretty laid back about things like this :) I'd rather share my knowledge and discoveries for free so others can learn than charge money for my tutorials. With all that said, on to the good stuff! :)


❦  ❦  ❦

Click any image to view a larger version

Materials

  • 1 14x10mm glass or stone cabochon (this tutorial uses a vintage glass cab from myAtlantis on Etsy; another great source is Yummytreasures on Etsy)
  • 24 inches of 20 gauge round wire
  • ~40 inches 26 gauge round wire
  • ~35 inches 20 gauge 1/2 round wire
Tools
  • Chain nose pliers
  • Flush cutters
  • Ring mandrel
Let's get started!


1.


Cut three 8" lengths of 20 gauge round wire. Decide what size you want your ring to be, and wrap one of the three lengths around your ring mandrel. It helps to first wrap your wire tightly at a size or two smaller than the size you want, then slide the wire down to the size you want. This will help ensure your ring comes out at the correct size instead of being too big.

2.


Your wire should be in a circle with two 'tails' - bend the tails upward, but make sure that the wires overlap for about 1/4 inch to 3/8 inches.

3.


Straighten out the circle in the wire, but be sure to keep the bends you made in the last step.

4.


Cut 16 inches of 26 gauge wire and 16 inches of 20 gauge half round wire. Wrap them both around the 20 gauge wire at the same time, just before the first bend in the 20 gauge wire. It's ok if this part is messy, we'll be undoing it later.

5.


Add the other two 20g wires cut in the first step, and use the 26g wire and the 20g half round wire to wrap the three 20g base wires together. Notice how the wrapping alternates from half round to 26g. By wrapping those two wires around the base wires at the same time, you end up with this look. It's best to continue wrapping by first wrapping the 26g around once, then the half round around once, switching back and forth. This step can also be done with only 26 gauge round or 20g half round if you prefer, but be sure you double the length of the wire when you cut it so you'll have enough to go down the length of the ring band.

6.


Continue wrapping until you get to the second bend in the 20g base wire.

7.


Wrap the wires around your ring mandrel again, starting at a smaller size and then moving it down the mandrel to the size you want. Note the section in the middle marked in purple where the wires on each end 'overlap'.

8. 


Unwind the wrapping wires in the area marked in purple in the last step. Adjust the size of your ring one more time by wrapping it around a smaller size on the mandrel and then sliding the wire down to your preferred size.

9.


Cut a 3" length of half round wire, and use it to bind the base wires together as shown, snip off the excess, and press the ends flat with your pliers.

10.


Bend the topmost base wire up, and use a 10" length of 26g wire and wrap around the base wire for 1 inch.

11.


On the middle base wire, use 8" of half round wire to wrap, also for 1 inch.

12.


Repeat steps 10 and 11 on the base wires on the opposite side.

13.


Carefully gather a 'set' of 3 base wires together and bend them up and over so they're pointing in the opposite direction. Repeat on the other side.

14.


This part can be a little fiddly, but it's not too terribly bad. Insert your cabochon so the 2 sets of three base wires are positioned across the top and bottom of the cab. Notice that the cab is not oriented straight up and down, but instead it lays at a bit of a diagonal.

15.


On one side, guide the three base wires up around the band and then push the ends down through the ring band so they're 'hooked' onto the band.

16.


Repeat the last step on the other side (these base wires will be pointing down, and you want to bend them UP through the ring band).

17.


Guide the base wires up around the band on both sides.

18.


Trim the wire ends somewhat close to the band; repeat on the other side.

19.


Carefully bend the wires cut in the last step around to the back of the band. Try to push them down pretty firmly with your pliers. Repeat on the other side, and you're done!

Here's a look at the back/inside of the ring, for reference-


I hope you enjoy making this ring! If you have any questions or to show me what you've made with this tutorial, let me know in the comments :D


Creative Commons License


Today I'll leave you with my mom's cat Vinnie, who seriously sleeps like this for some reason.


Til next time!


Wednesday, July 15, 2015

Free Tutorial - Papillon Earrings

Hello everyone!

I think it's time for another in-depth tutorial - this time, my Papillon Earrings!

Mariposa butterfly wire wrapped earrings


❦  ❦  ❦

Note: this tutorial is protected by an International Creative Commons Attribution-NonCommercial-ShareAlike licence. This means that you are free to post this wherever you like as long as you give proper Attribution (that is, to me, Jet Kosanke, and my website, malfaitluciu.blogspot.com), it may not be used commercially (you're not allowed to make money off it, that is, sell this tutorial to other people for money), and you're free to make changes to it as long as you also share it under these same restrictions (that is, you still give Attribution to me, you don't sell it, and you allow it to be shared freely.) For more information, click the Creative Commons link at the end of the tutorial.By the way- NonCommercial doesn't mean you can't sell works you make using this tutorial. If you make a necklace, bracelet, or whatever using this tutorial, feel free to sell it- however, you may not mass-produce it, and the Attribution part still applies, that is, you still have to attribute the design to me.If you're unsure if what you want to do is allowed, just ask me! I'm really pretty laid back about things like this :) I'd rather share my knowledge and discoveries for free so others can learn than charge money for my tutorials. With all that said, on to the good stuff! :)


❦  ❦  ❦

Click on any image to view a larger version.


Materials (for 1 earring):
  • Dead soft 20 gauge wire - 3 inches
  • Dead soft 26 gauge wire - 50 inches
  • 40ss Swarovski flat back rhinestones in Crystal Volcano color (3)
  • 40ss rhinestone Montee settings (3)
  • short scrap of 20 gauge wire (color doesn't matter, we'll be using it as a mandrel)


1. Cut a 3 inch length of 20 gauge wire.


2. Use your chain nose pliers to make a tiny little curl in one end of the wire. The tinier the better!


3. Flatten  the curl you made in the last step so that the wire end is touching the tail end and there's no gap (or very little gap) in the center of the little coil.


4. Use your flat nose pliers to grasp the curl, and then wind the wire around the little curl, turning as you go. Be patient and methodical here, don't rush it. Tiny movements and bends are best.


5. Stop coiling when the spiral is about the same diameter as the rhinestones (really you can coil to your heart's content and make the spiral as large or small as you want, I just like the way it looks when it's the same size as the rhinestones)


6. Bend the tail of the spiral straight up.


7. Make another bend, about a quarter of an inch above the bend in step 6.


8. Use your round nose pliers and make a loop with a tail sticking out to the side.


9. Wrap the tail around the straight part of the wire two or three times. Take your time here, keep a light touch with your pliers, and bend bit by bit.


10. Cut a 6 inch length of 26 gauge wire. Use your round nose pliers to make a loop, but leave the tail sticking out for a moment.


11. Slide the tail of your 26g wire into the loop in the spiral dangle.


12. Wrap the tail of the 26g wire around itself a couple of times to create a sturdy connection.


13. Set the spiral aside for now. Take your scrap of 20g wire and begin wrapping it with 18 inches of the 26g wire.


14. Slide the coil off the 20g scrap wire. Make three more coils- you want to make two coils 1 3/4 inches long, and two coils 1 inch long (uses about 12 inches of 26g wire).


15. Set the coils aside, and pick up the spiral dangle with the 26g wire attached. Slide a montee onto the thinner wire.


16. Slide on two more montees.


17. Make a wrapped loop at the top, and try to position it so that the montees are really nice and snug together.


18. Cut a 13 inch length of 26g wire. Slide it through the horizontal channel of the first montee. Slide it through to the middle of the wire. You want equal halves of wire, one coming out each side.


19. Slide on one of your short coils from earlier onto the wire we added in the last step. After you've strung the coil on, pass the core wire through the horizontal channel of the middle montee, and pull tight!


20.  Repeat on the other side, making sure you're using the shorter length of coils.


21. Add the top halves of the wings the same way.


22. We have to do something with the two pieces of wire sticking up, so I like to use the tails to wrap three or four times around the top of the top half of the wing, right next to the crystal. Then I trim the excess. Repeat on the other side.


23. Mostly done, all that's left is to use your fingers to shape the two segments of each wing into a pleasing arrangement.


Add an earwire and you're done!


Creative Commons License


I hope you enjoyed my tutorial! If you use it to make something, please leave me a link in the comments; I would be thrilled to see it!

Don't forget, my Custom Ring Giveaway ends tomorrow! It's super easy to enter, just one comment is required :)

'Til Next Time!